
Email/Password Logins with Nuxt Auth Utils and Nuxt UI

In this article, we’ll walk through implementing a secure email/password authentication system in your Nuxt 3 application using Nuxt Auth Utils and NuxtUI. You’ll learn how to set up both login and registration flows, secure routes with middleware, and create a smooth user experience with Nuxt’s powerful tools.
While Nuxt Auth Utils provides a lot of features out of the box like social logins and passkey logins, there’s no prescribed way to handle user/password login. There’s good reason for this, since people have different storage solutions for their users. In this article, we’ll use KV storage thanks to the power of Nuxt’s useStorage composable. But you can adapt it with very little effort to any other storage solution like a database or a third party service.
BTW, There’s a Video Course for This
If you’d like to learn how to build this app and also utilize the other features of Nuxt Auth Utils, check out our full video course. It goes over email/password logins but also social logins, passkey logins, and all of the other features of Nuxt Auth Utils.
What We’ll Build In this Article
In this article we’ll walk step by step through the following features:
- A login page with email/password authentication
- A registration page for new users
- Protected routes that only authenticated users can access (with middleware)
- A clean, modern UI using NuxtUI components
- Server side authentication endpoints
- Type safe user session data
Setting Up Your Project
Let’s start by creating a new Nuxt project and installing the necessary dependencies.
# Create a new Nuxt projectnpm create nuxt nuxt-auth-app
cd nuxt-auth-app

# Install dependencies# (we'll use zod to validate the form)
npm install zod

## Install Nuxt module
snpx nuxi add @nuxt/eslint @nuxt/ui nuxt-auth-utils
We’ll also use the version 4 directory structure. This isn’t necessary but it’s a good idea at this point to get used to the new directory structure.
// nuxt.config.ts
export default defineNuxtConfig({
  future: {
    compatibilityVersion: 4,  },  //...});
Building the Login Page with Nuxt UI
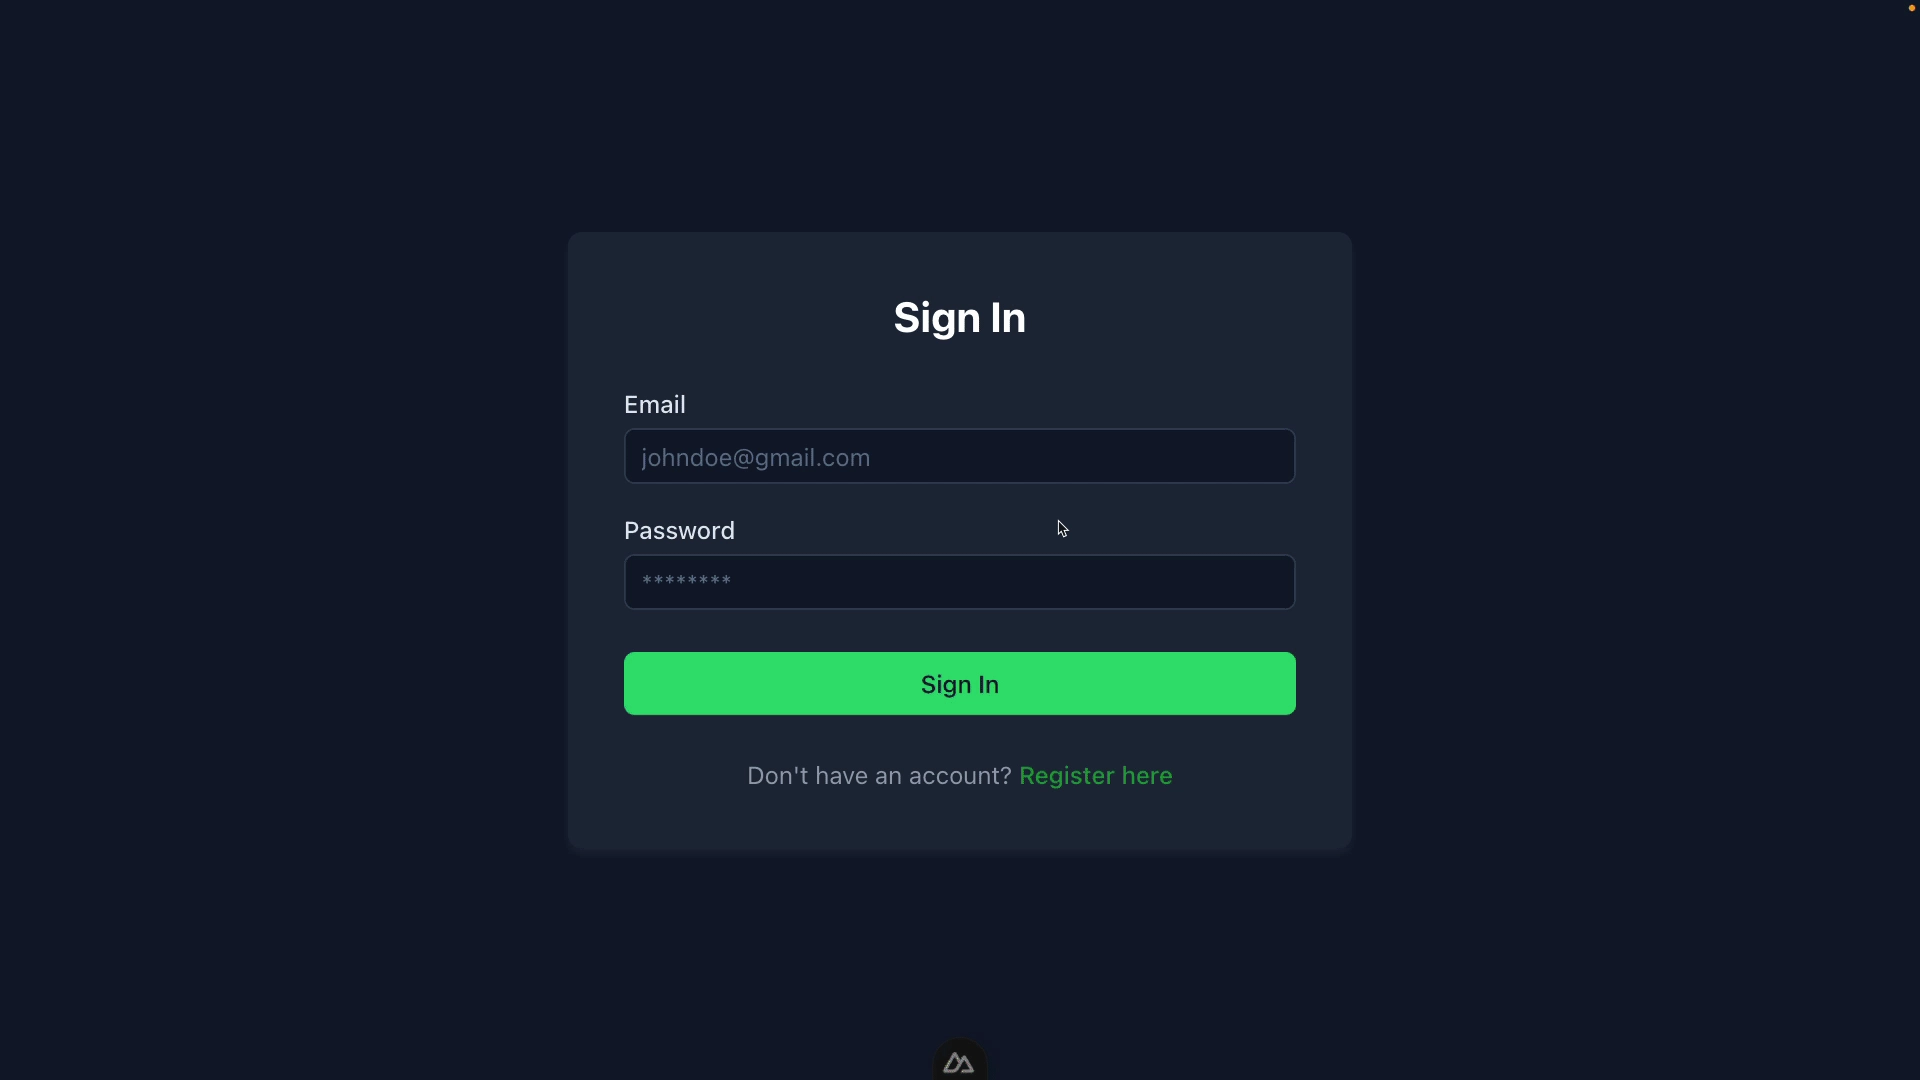
Now, let’s create a login page with a form for users to enter their credentials.
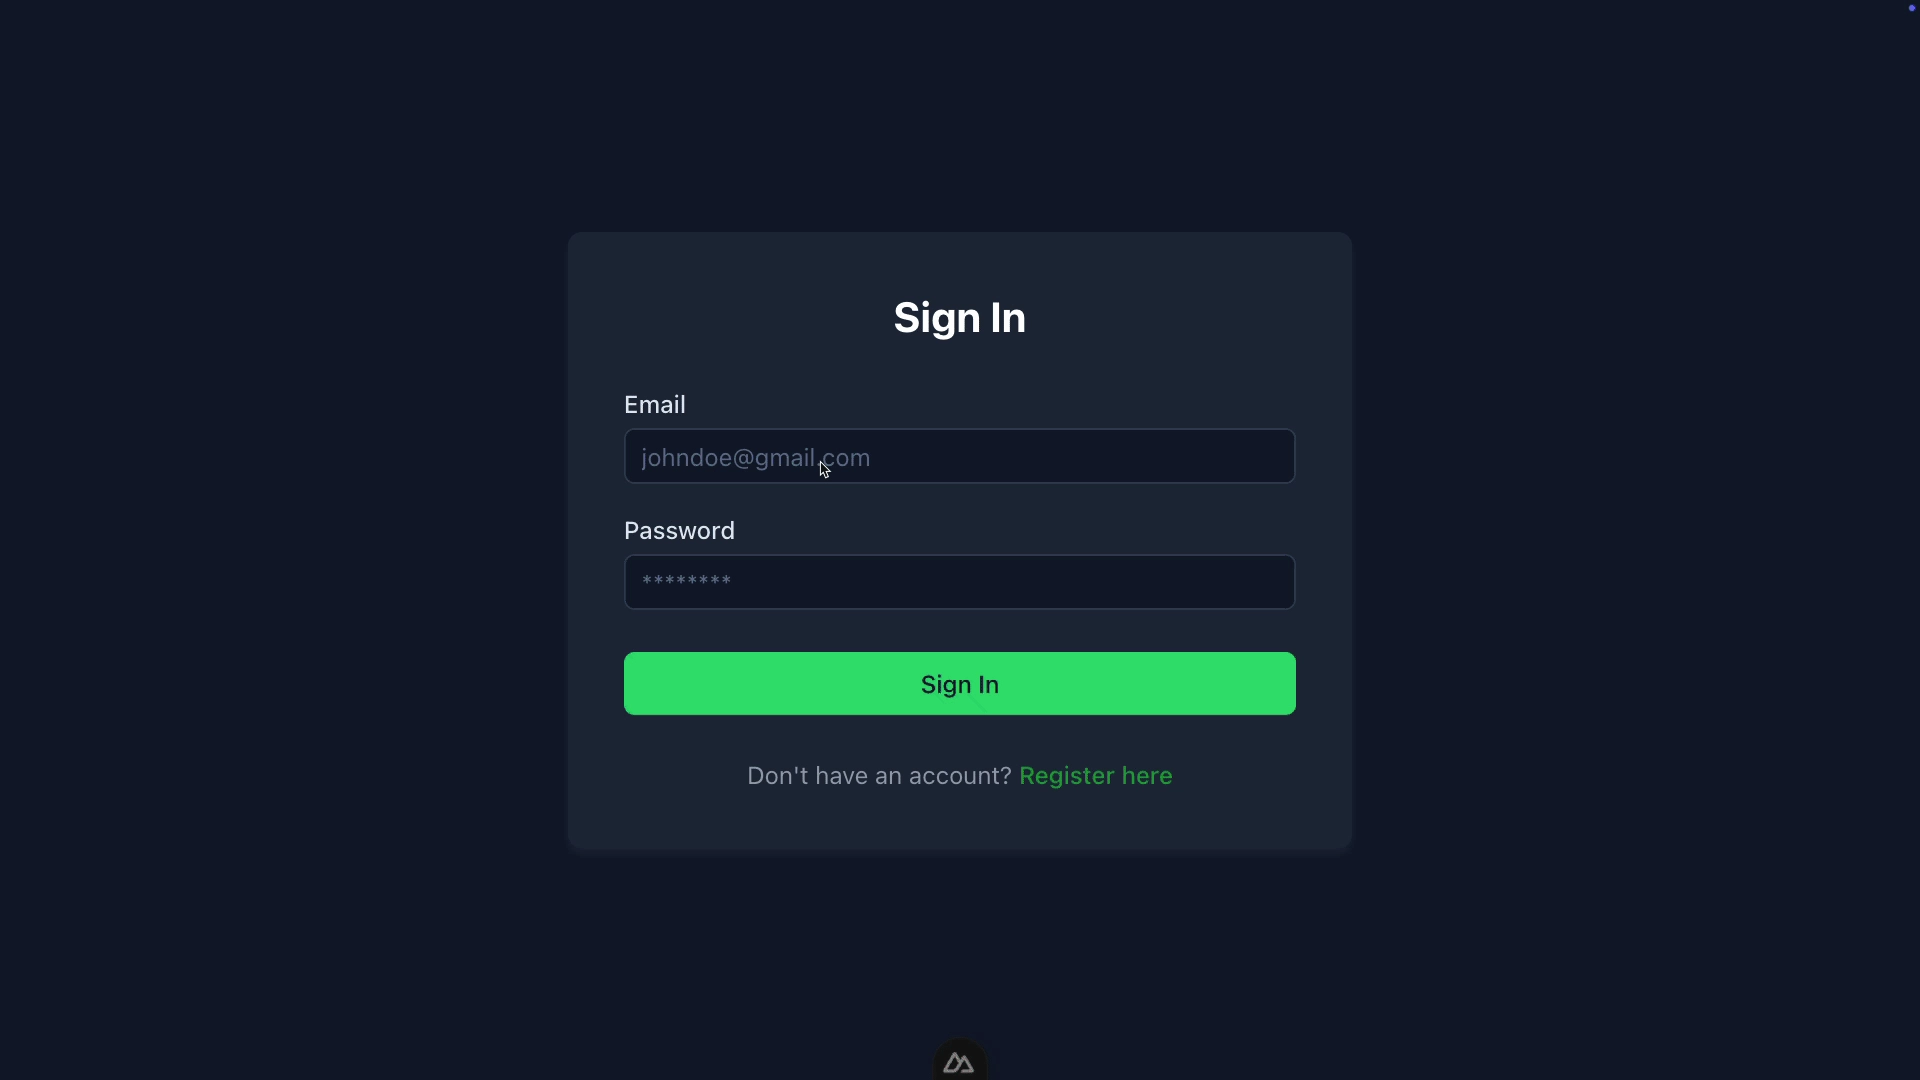
First, we’ll create a reusable login form component and use zod to validate the form.
With Nuxt UI, it’s easy to show error messages based on the zod schema.
<!-- app/components/LoginForm.vue -->
<script setup>
  import { ref } from "vue";
  import { z } from "zod";

  const emit = defineEmits(["login"]);

  // define the form value requirements with zod
  // makes validation easy and expressive
  // plus works great with Nuxt UI
  const schema = z.object({
    email: z.string().email("Invalid email"),
    password: z.string(),
  });

  // keep track of the form values
  const form = ref({
    email: "",
    password: "",
  });

  // since the login form will be a "dumb" component
  // (https://vueschool.io/lessons/smart-vs-dumb-components)
  // it will simply emit the form values to the parent on submit
  const handleSubmit = async () => {
    emit("login", form.value);
  };
</script>

<template>
  <!--  layout markup ommited for brevity -->
  <UForm
    :state="form"
    :schema="schema"
    @submit="handleSubmit"
  >
    <UFormField label="Email" name="email">
      <UInput v-model="form.email" />
    </UFormField>

    <UFormField label="Password" name="password">
      <UInput v-model="form.password" type="password" />
    </UFormField>

    <UButton type="submit" color="primary" block>Sign In</UButton>
  </UForm>
</template>
Next, create the login page that uses this component. Later on we’ll hook it up to an API endpoint to actually set the user session data and officially “login”.
<!-- app/pages/login.vue -->
<script setup lang="ts">
  function handleLogin(form: { email: string; password: string }) {
    console.log(form);
  }
</script>

<template>
  <LoginForm @login="handleLogin" />
</template>
Building the Registration Page with Nuxt UI
Next, let’s create a registration form for new users.
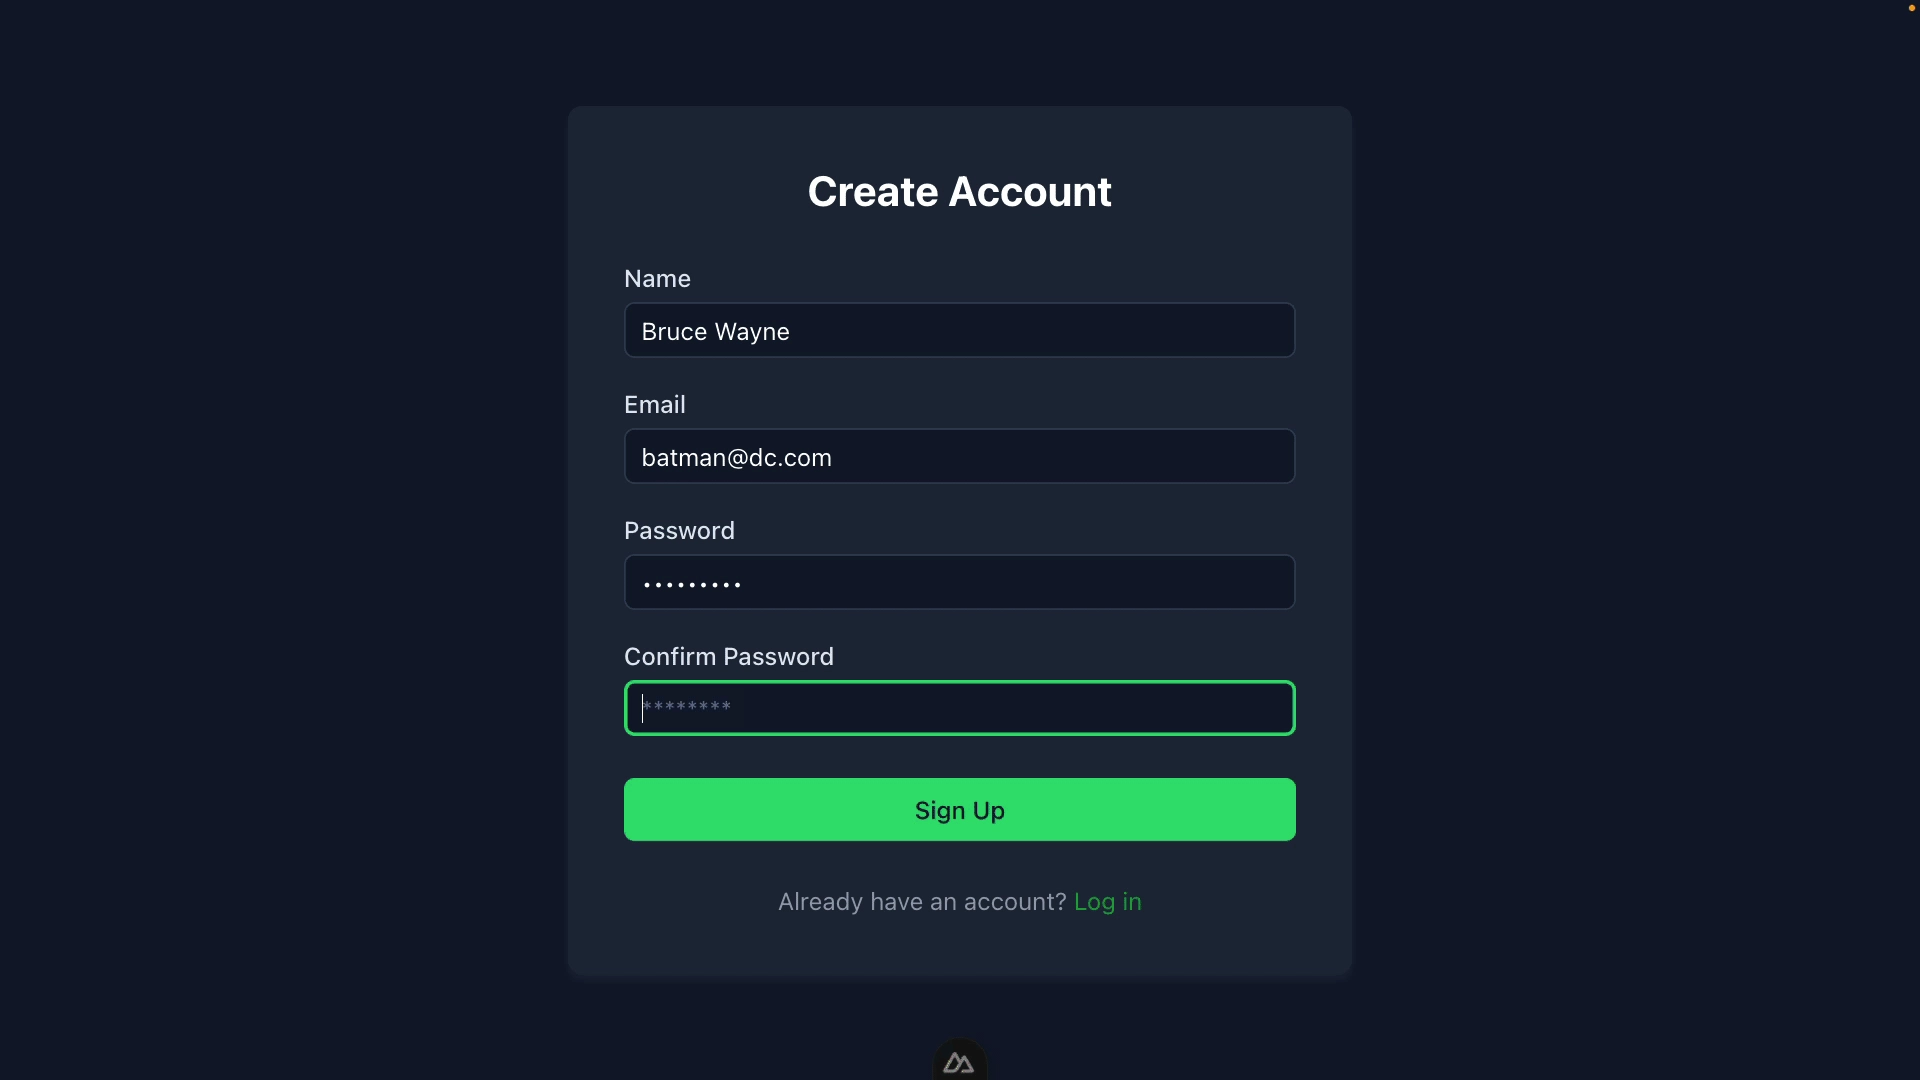
Just like the login form, we’ll create a “dumb” reusable registration form component.
<!-- app/components/RegisterForm.vue -->
<script setup>
  import { ref } from "vue";
  import { z } from "zod";

  const emit = defineEmits(["register"]);

  // once again, we'll use zod to validate the form
  const schema = z
    .object({
      name: z.string().min(3, "Name must be at least 3 characters"),
      email: z.string().email("Please enter a valid email"),
      password: z.string().min(6, "Password must be at least 6 characters"),
      confirmPassword: z.string(),
    })
    // we'll also make sure the passwords match
    // with the zod refine methods
    .refine((data) => data.password === data.confirmPassword, {
      message: "Passwords don't match",
      path: ["confirmPassword"],
    });

  // keep track of the form values
  const form = ref({
    name: "",
    email: "",
    password: "",
    confirmPassword: "",
  });

  // also just like before, we'll emit the form values to the parent on submit
  const handleSubmit = async () => {
    const { confirmPassword, ...registerData } = form.value;
    emit("register", registerData);
  };
</script>

<template>
  <!--  layout markup ommited for brevity -->
  <UForm :state="form" :schema="schema" @submit="handleSubmit">
    <UFormField label="Name" name="name">
      <UInput v-model="form.name" />
    </UFormField>

    <UFormField label="Email" name="email">
      <UInput v-model="form.email" />
    </UFormField>

    <UFormField label="Password" name="password">
      <UInput v-model="form.password" type="password" />
    </UFormField>

    <UFormField label="Confirm Password" name="confirmPassword">
      <UInput v-model="form.confirmPassword" type="password" />
    </UFormField>

    <UButton type="submit" color="primary" block> Sign Up </UButton>
  </UForm>
</template>
Then we can create the registration page that uses this component, that just console logs on submit for now.
<!-- app/pages/register.vue -->
<script setup lang="ts">
  function handleRegister(form: {
    name: string;
    email: string;
    password: string;
  }) {
    console.log(form);
  }
</script>

<template>
  <RegisterForm @register="handleRegister" />
</template>
Implementing Server-Side Authentication Endpoints
Now, let’s create the server-side endpoints to handle authentication. We’ll need two main endpoints:
- A login endpoint (
/api/auth/login) that verifies user credentials and creates a session with Nuxt Auth Utils - A registration endpoint (
/api/auth/register) that creates new user accounts
These endpoints will use Nuxt’s built-in storage system to persist user data and handle session management. We’ll also implement proper password hashing and error handling to ensure security courtesy of Nuxt Auth Utils.
Let’s look at each endpoint in detail:
Create a User Registration Endpoint for Email/Password Logins with Nuxt Auth Utils
This endpoint is responsible for creating a new user account in persistent storage along with their hashed password. We’ve used the useStorage composable to store the user data in KV storage but you replace it with your storage solution of choice. You could even use KV storage in production depending on your use case and your needs for filtering, sorting, and querying users.
// server/api/auth/register.post.ts
export default defineEventHandler(async (event) => {
  // Clear the current user session just in case
  await clearUserSession(event);

  // get the storage instance
  const storage = useStorage("data");

  // get email, password, name from the post body
  // for a more robust solution you could use zod to validate the body
  const body = await readBody(event);
  const { email, password, name } = body;

  // check if email already exists in storage
  // and return an error if it does
  const existingUser = await storage.getItem(email);
  if (existingUser) {
    return createError({
      statusCode: 400,
      statusMessage: "User already exists",
    });
  }

  // if the user doesn't exist, create a new user object
  // You could also include some other user data here like a profile picture, bio, etc. based on your registration form
  const user = {
    name,
    email,
    createdAt: new Date(),
  };

  // and store it in KV storage
  // along with the hashed password
  await storage.setItem(email, {
    ...user,
    // make sure to hash the password with Nuxt Auth Utils's built-in function
    // never store plain text passwords!
    password: await hashPassword(password),
  });

  // NOTE: You could also include email verification by
  // 1. generating a token and storing the token in KV storage
  // 2. sending the token to the user's email address
  // 3. checking the token sent to the user's email address against the token in KV storage

  // finally set the userSession cookie with the new user data
  // so that the user is logged in after registration
  // I hate it when apps don't log you in after registration! ?
  return await setUserSession(event, {
    user,
    loggedInAt: new Date(),
  });
});
Make the User Session Type Safe
Now that we know what a user object looks like, we can make the user session type safe. Using the below type definition, Nuxt Auth Utils will correctly type the user object and session data returned from all it’s functions.
// auth.d.ts
declare module "#auth-utils" {
  // the user as it is available on the client side
  interface User {
    name: string;
    email: string;
    createdAt: Date;
  }

  // the session includes the user and any other session data you want to store
  interface UserSession {
    loggedInAt: Date;
  }

  // the secure session data is only available on the server side
  // we didn't add any secure session data in this example
  interface SecureSessionData {
    // Add your own fields
  }
}

export {};
Create a Login Endpoint for Email/Password Logins with Nuxt Auth Utils
Next up, we need to create the login endpoint.
This endpoint is responsible for verifying user credentials and creating a session with Nuxt Auth Utils if they are valid. Once again, we’ve used useStorage but you choose your favorite storage solution (regardless the flow remains the same).
// server/api/auth/login.post.ts
import { User } from "#auth-utils";
export default defineEventHandler(async (event) => {
  const storage = useStorage("data");

  // get the email and password from the post body
  // for a more robust solution you could use zod to validate the body
  const { email, password } = await readBody(event);

  // get the user from the storage
  // we'll make sure to include the password in the user object as it's stored in storage
  // but it's not returned from the server as part of the user object
  const user = await storage.getItem<User & { password?: string }>(email);

  // if the user doesn't exist, return an error
  if (!user) {
    return createError({
      statusCode: 400,
      statusMessage: "Please check your email and password.",
    });
  }

  // if the user does exist, we'll verify the password
  // we'll use the verifyPassword function from Nuxt Auth Utils
  // to compare the stored hashed password with the user provided password
  const isPasswordValid = await verifyPassword(user?.password || "", password);

  // if the password is invalid, return an error
  if (!isPasswordValid) {
    return createError({
      statusCode: 400,
      statusMessage: "Please check your email and password.",
    });
  }

  // if the password is valid, we can set the session
  // without the user data without the password (for security)

  delete user.password;
  await setUserSession(event, {
    user,
    loggedInAt: new Date(),
  });

  // finally return the session data to the client
  // not really necessary but could be useful for the app to have
  return await getUserSession(event);
});
Hooking Up the Login and Register Endpoints to the Pages
Now that we have the endpoints, we can hook them up to the pages. Let’s start by replacing the console log in the login page with the actual login logic.
<!-- app/pages/login.vue -->
<script setup lang="ts">
  const { fetch } = useUserSession();
  const toast = useToast();
  // on the login event, we'll call a login api endpoint
  const handleLogin = async (form: { email: string; password: string }) => {
    try {
      // call the login endpoint we just created
      await $fetch("/api/auth/login", {
        method: "POST",
        body: form,
      });

      // on successful login, we need to fetch the updated session
      // nuxt auth utils has a built in function for this
      await fetch();

      // then navigate to the protected part of the app
      navigateTo("/protected");
    } catch (error) {
      // if there's an error, notify the user with a NuxtUI toast
      // (for toast to work make sure wrap everything in app.vuew with the UApp component)
      if (error && typeof error === "object" && "statusMessage" in error) {
        toast.add({
          color: "error",
          title: "Login failed",
          description: error.statusMessage as string,
        });
      } else {
        console.error(error);
      }
    }
  };
</script>
Then we can do the same for the registration page. This is all basically the same as the login page, but it calls the registration endpoint instead.
<!-- app/pages/register.vue -->
<script setup lang="ts">
  const { fetch } = useUserSession();
  const toast = useToast();

  const handleRegister = async (form: {
    name: string;
    email: string;
    password: string;
  }) => {
    try {
      // call the registration endpoint here
      // everything else is basically the same as the login page
      await $fetch("/api/auth/register", {
        method: "POST",
        body: form,
      });
      await fetch();
      navigateTo("/protected");
    } catch (error) {
      if (error && typeof error === "object" && "statusMessage" in error) {
        toast.add({
          color: "error",
          title: "Registration failed",
          description: error.statusMessage as string,
        });
      } else {
        console.error(error);
      }
    }
  };
</script>
Creating Protected Routes
Finally, what good is an authentication system without protected routes? Let’s create a protected page that only authenticated users can access.
<!-- app/pages/protected.vue -->
<script setup>
  const { user, clear } = useUserSession();

  function logout() {
    clear();
    navigateTo("/login");
  }
</script>

<template>
  <!-- layout markup ommited for brevity -->
  <pre>{{ user }}</pre>
</template>
As is, this page will be accessible to everyone, only user will be null. A more user friendly and less error prone approach would be to redirect to the login page if the user is not authenticated.
We can do this with route middleware.
Creating an Auth Middleware
Inside the middleware directory, we’ll created a named route middleware that will redirect to the login page if the user is not authenticated. It uses the loggedIn boolean from the useUserSession composable to check if the user is authenticated.
// app/middleware/auth.ts
export default defineNuxtRouteMiddleware(async (to) => {
  const { loggedIn } = useUserSession();

  if (!loggedIn.value) {
    return navigateTo("/login");
  }
});
Now we can update the protected.vue page to use this middleware.
// app/pages/protected.vue
definePageMeta({
  middleware: "auth",
});
Putting It All Together
At this point, you should be able to register a new user, log in with the newly created user, and access user data from the protected page! ?
If you’d like to see the complete code for this tutorial, you can find a the complete codebase on Github.
Conclusion
In this tutorial, we’ve built a simple but real world email/password authentication system using Nuxt Auth Utils and NuxtUI. These powerful tools make it easy to implement secure authentication in your Nuxt applications with minimal boilerplate code.
By leveraging the power of Nuxt’s server endpoints, middleware, and the useUserSession composable, we’ve created a seamless authentication experience that’s both secure and user-friendly.
You can extend this system further by:
- Adding password reset functionality
- Implementing email verification
- Adding social login options
- Enhancing security with two-factor authentication
Remember, if you’d like to dive deeper into Nuxt Auth Utils and the other login options it provides, then checkout our complete video course ?
Start learning Vue.js for free

Comments
Latest Vue School Articles

Just Released: Nuxt Hub Multi-Vendor and First-Class DB

Vue.js – 2025 In Review and a Peek into 2026
Our goal is to be the number one source of Vue.js knowledge for all skill levels. We offer the knowledge of our industry leaders through awesome video courses for a ridiculously low price.
More than 200.000 users have already joined us. You are welcome too!
© All rights reserved. Made with ❤️ by BitterBrains, Inc.