
How to Use Vue Router: A Complete Tutorial

One of the most powerful features of modern single-page web applications (SPA) is routing. Modern single-page apps such as a Vue application can transition from page to page on the client-side (without requesting the server). Vue Router is the official library for page navigation in Vue applications. Vue Router is simple to use, yet powerful. In this article, we will deep dive into Vue Router 4 (used with Vue 3). We will go over everything you need to know to use Vue Router comfortably.
We will cover:
- Vue Router Fundamentals
- Dynamic routing
- How to pass router params
- Lazy loading
Whether you are a beginner just getting into Vue Router or a seasoned JavaScript/Vue developer looking to skill up, there’s something for you in this tutorial. Let’s get started.
? We have also created a completely free in-depth Vue Router video course. If you learn better by watching videos, we highly recommend you give it a shot. Click here to watch the Vue Router course.
Vue Router Fundamentals
Let’s create a new project and get right into coding. We’ll create a new project with create-vue. The create-app is the official Vue project scaffolding tool. It creates a Vue.js app based on Vite.
All we need to do is to run the below command in the terminal.
npm create vue@latestIt'll display a message prompting you to download "create-vue". Once that's done, it'll present some prompts to assist in configuring the app.
One of the prompts is for adding Vue Router. Make sure to select 'yes':
✔ Project name: … myapp
✔ Add TypeScript? … No / Yes
✔ Add JSX Support? … No / Yes
✔ Add Vue Router for Single Page Application development? … No / Yes
✔ Add Pinia for state management? … No / Yes
✔ Add Vitest for Unit Testing? … No / Yes
✔ Add an End-to-End Testing Solution? › No
✔ Add ESLint for code quality? … No / Yes
✔ Add Prettier for code formatting? … No / Yes
✔ Add Vue DevTools 7 extension for debugging? (experimental) … No / Yes
Let’s take a look at the folder structure that was created for us.
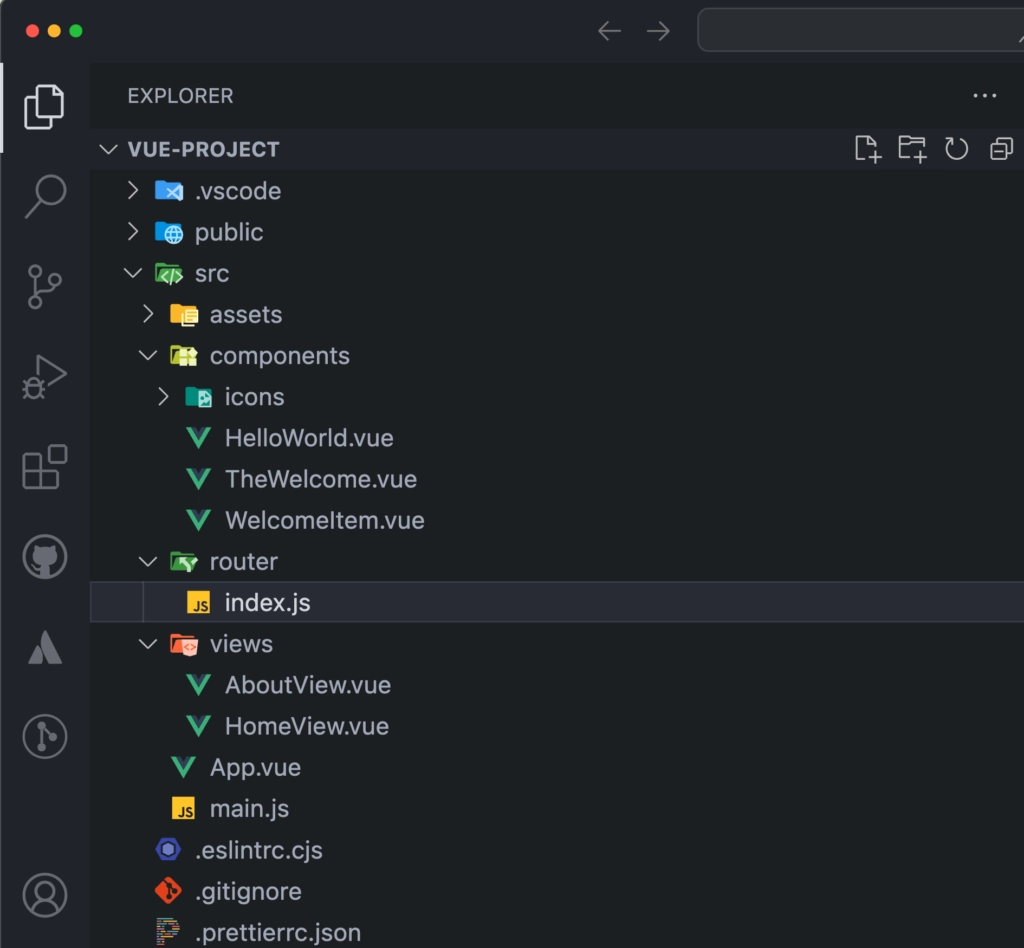
A folder named views is created for us along with two files AboutView.vue and HomeView.vue. These files represent our pages. A file named router/index.js file is also generated. This file contains all the router configurations. Let’s open up the router/index.js file.
import { createRouter, createWebHistory } from 'vue-router'
import HomeView from '../views/HomeView.vue'

const router = createRouter({
  history: createWebHistory(import.meta.env.BASE_URL),
  routes: [
    {
      path: '/',
      name: 'home',
      component: HomeView
    },
    {
      path: '/about',
      name: 'about',
      // route level code-splitting
      // this generates a separate chunk (About.[hash].js) for this route
      // which is lazy-loaded when the route is visited.
      component: () => import('../views/AboutView.vue')
    }
  ]
})

export default router
We are importing createRouter and createWebHistory from the vue-router library. Next, we import the Home component from views/HomeView.vue. On line 6 we are declaring an array of objects named routes. This array represents our routes in the application. These array items are called route objects. The first route object has a path / which means this is going to be our base URL. The component property represents what component will be rendered when the user visits this path. We will render the Home page on this path. Finally, the name property represents the name of the route.
We are pretty much following the same logic for the /about the path. However, instead of directly importing the component we are importing it through Vite's dynamic imports feature. More on this later.
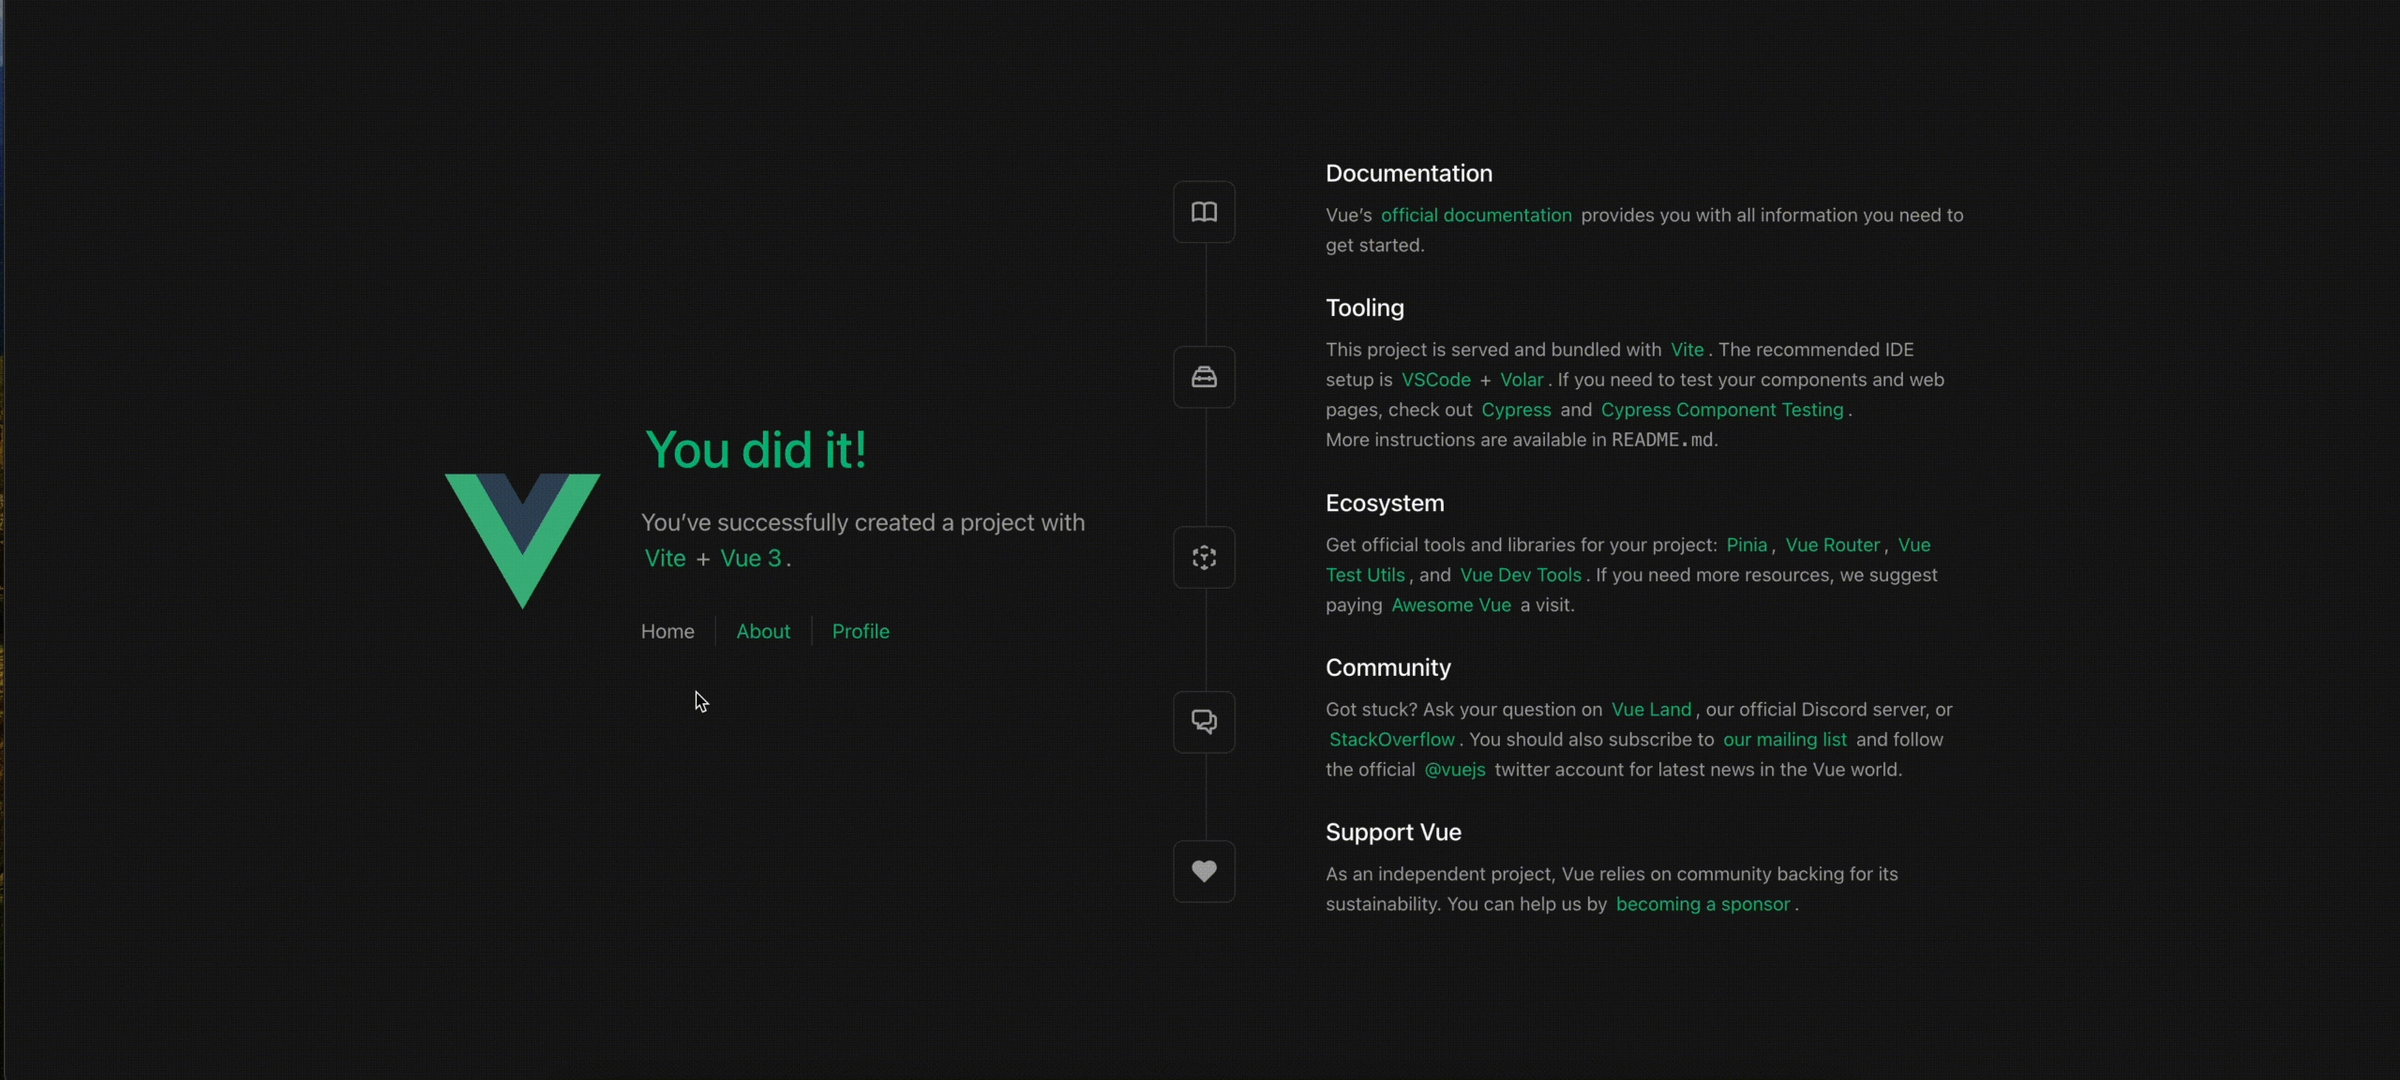
Now let’s jump into App.vue file.
<script setup>
  import { RouterLink, RouterView } from 'vue-router'
  import HelloWorld from './components/HelloWorld.vue'
</script>

<template>
  <header>
    <img alt="Vue logo" class="logo" src="@/assets/logo.svg" width="125" height="125" />

    <div class="wrapper">
      <HelloWorld msg="You did it!" />

      <nav>
        <RouterLink to="/">Home</RouterLink>
        <RouterLink to="/about">About</RouterLink>
      </nav>
    </div>
  </header>

  <RouterView />
</template>
Observe the RouterLink tags. These tags are just fancy anchor links. However unlike an anchor link (<a href=""> tag) the <router-link> will not reload the whole page. Remember Vue is a single-page application. The data for the app is already downloaded from the server. When we route to another view the application just hides some information and displays the requested information. router-link tags have a to property which refers to which page to visit. The <router-view/> tag is what renders the right component when navigation links are triggered.
Let’s add our own route to this application.
<nav>
  <RouterLink to="/">Home</RouterLink>
  <RouterLink to="/about">About</RouterLink>
  <RouterLink to="/profile">Profile</RouterLink>
</nav>
We need to add a new router-link to App.vue. Next we create a new component in the views directory.
<template>
  <div class="about">
    <h1>Profile info</h1>
  </div>
</template>
Finally, in our routes array we have to import this and specify the route path.
import { createRouter, createWebHistory } from 'vue-router'
import HomeView from '../views/HomeView.vue'
import ProfileView from '../views/ProfileView.vue'

const router = createRouter({
  history: createWebHistory(import.meta.env.BASE_URL),
  routes: [
    {
      path: '/',
      name: 'home',
      component: HomeView
    },
    {
      path: '/profile',
      name: 'profile',
      component: ProfileView
    },
    {
      path: '/about',
      name: 'about',
      // route level code-splitting
      // this generates a separate chunk (About.[hash].js) for this route
      // which is lazy-loaded when the route is visited.
      component: () => import('../views/AboutView.vue')
    }
  ]
})

export default router
That’s it! We have our own routes added to the application.
How to use router params with Vue Router
First of all, let’s take a look at what router parameters (router params in short) are and why they are important. Let’s say we have a page in our application where we show users a list of all the blog posts available.
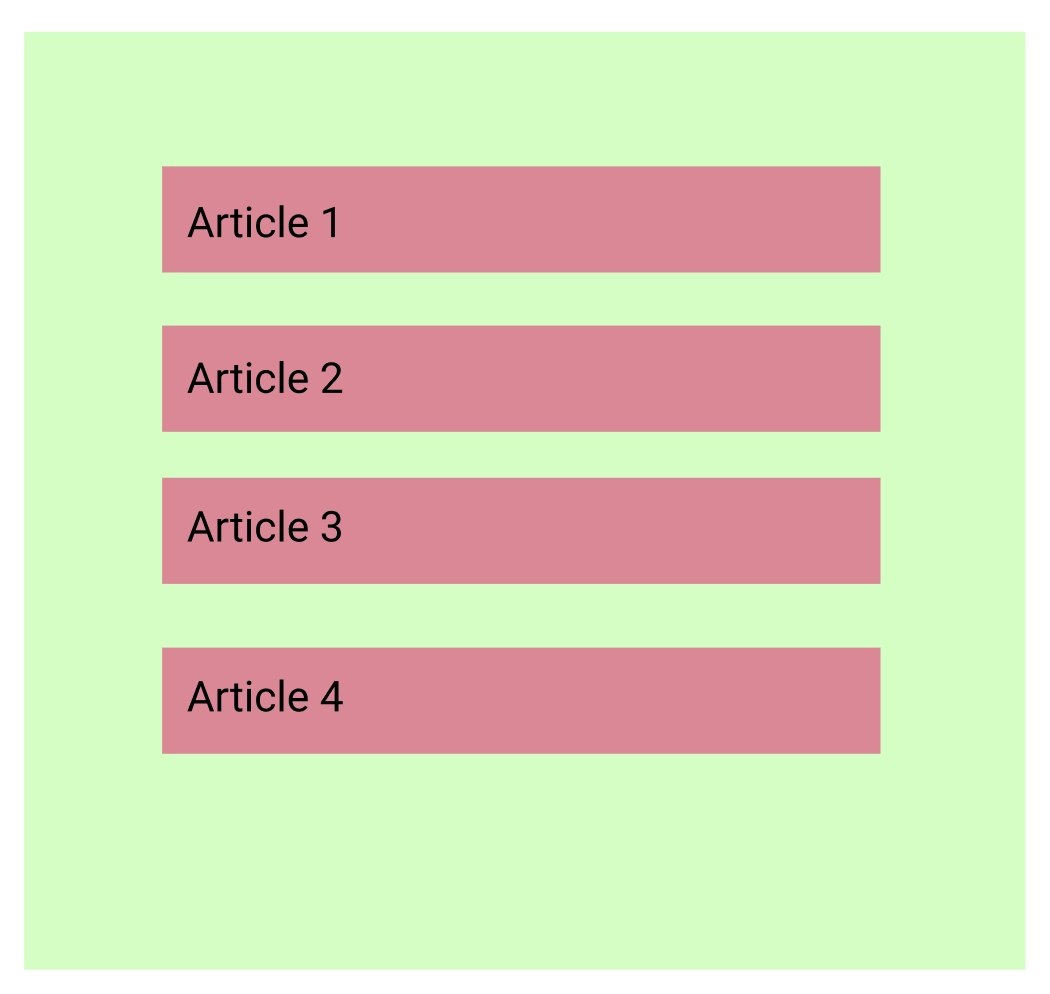
Let’s say in our application this path is /posts. When a user clicks on any of these articles the user is taken to that article page. For each article the path will be different (/posts/article-1, /posts/article-2, etc.). How do we achieve this? We can add a new route for every post we have, but then we have to change our code every time a new post is published. Therefore, we will use a dynamic route. This is where router params comes in handy.
In our application, we can specify a generic route like the /posts and, then we can specify optional route params to the same route like this /posts/:id. The :id picks up any dynamic string as a parameter. This means we can now route to paths like /posts/article-1 , /posts/article-2, etc. and the Vue router in the application will know which path we are trying to go to.
Let’s see this in action inside our application. I'll modify the /profile router-link in App.vue:
<nav>
  <RouterLink to="/">Home</RouterLink>
  <RouterLink to="/about">About</RouterLink>
  <RouterLink :to="{ name: 'profile', params: { username: 'mark2021' } }">Profile</RouterLink>
</nav>
In the router-link tag, we can bind the :to property to pass in an object with name and params data. The params object can be any type of data (i.e. strings, numbers, objects). In the code snippet above we are passing in an object with username with a string value (mark2021).
How to access route params from the view
When we add Vue router to our Vue.js application we get access to a special $route object inside the global scope of our application. This object holds all the router information of our application. We can access $route object by simply calling $route in the template. The params information is also available within this $route object. We can access the params object inside of the Profile component through the $route object. Take a look at the code snippet below.
<template>
  <div class="about">
    <h1>Profile info</h1>
    <p>{{ $route.params.username }}</p>
  </div>
</template>
To access the same route inside the script setup with Composition API, we can import useRouter from vue-router:
<script setup>
import { useRoute } from 'vue-router'
import { ref, watch } from 'vue'

const route = useRoute()

const username = ref(route.params.id)
</script>
Dynamic Routing
Below is a quick reference table to help you visualize how dynamic routes work.
| route pattern | URL path | $route.params |
|---|---|---|
| /product/:name | /product/apple-watch | { name: "apple-watch"} |
| /product/:name/comment/:comment_id | /product/apple-watch/comment/123 | { name: 'apple-watch', comment_id: '123' } |
In the previous section we saw how, we can pass in additional information with <router-link>. Dynamic routes are a similar concept. In this scenario the parameter is a part of the URL itself.
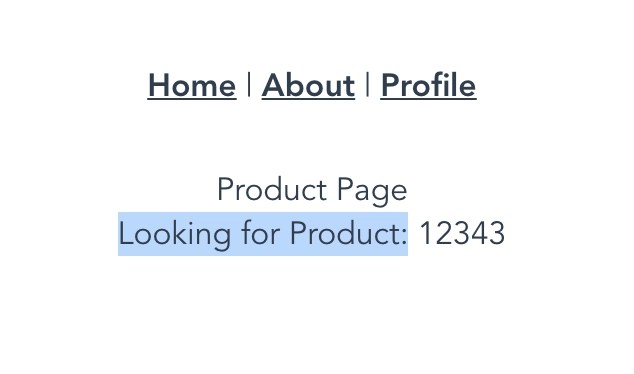
Let’s take a look how we can define dynamic routes in our application. Let’s create a new component under view and call it Product.
    <template>
      <div>
        Product Page
      </div>
      <span>
          Looking for Product: {{ $route.params.id }}
      </span>
    </template>
Now we can add this component to our routes.
    const routes = [
      // rest of the code ...
      { path: '/product/:id', component: Product },
    ]
Notice we appended a dynamic parameter to :id to the URL. Now if you visit http://localhost:8080/product/12343 in our browser you can see that the component will have access to the dynamic parameter that was passed through the URL.
We could then use this Id to fetch the actual product from our API in a lifecycle hook.
We can also have multiple dynamic parameters in our URL. The dynamic segments will map to corresponding fields of $route.params.
Let’s take a look at how it works. we will first make some quick changes in our product route.
const routes = [
// rest of the code ...
{ path: '/product/:id/:category', component: () => import('../views/Product.vue') }
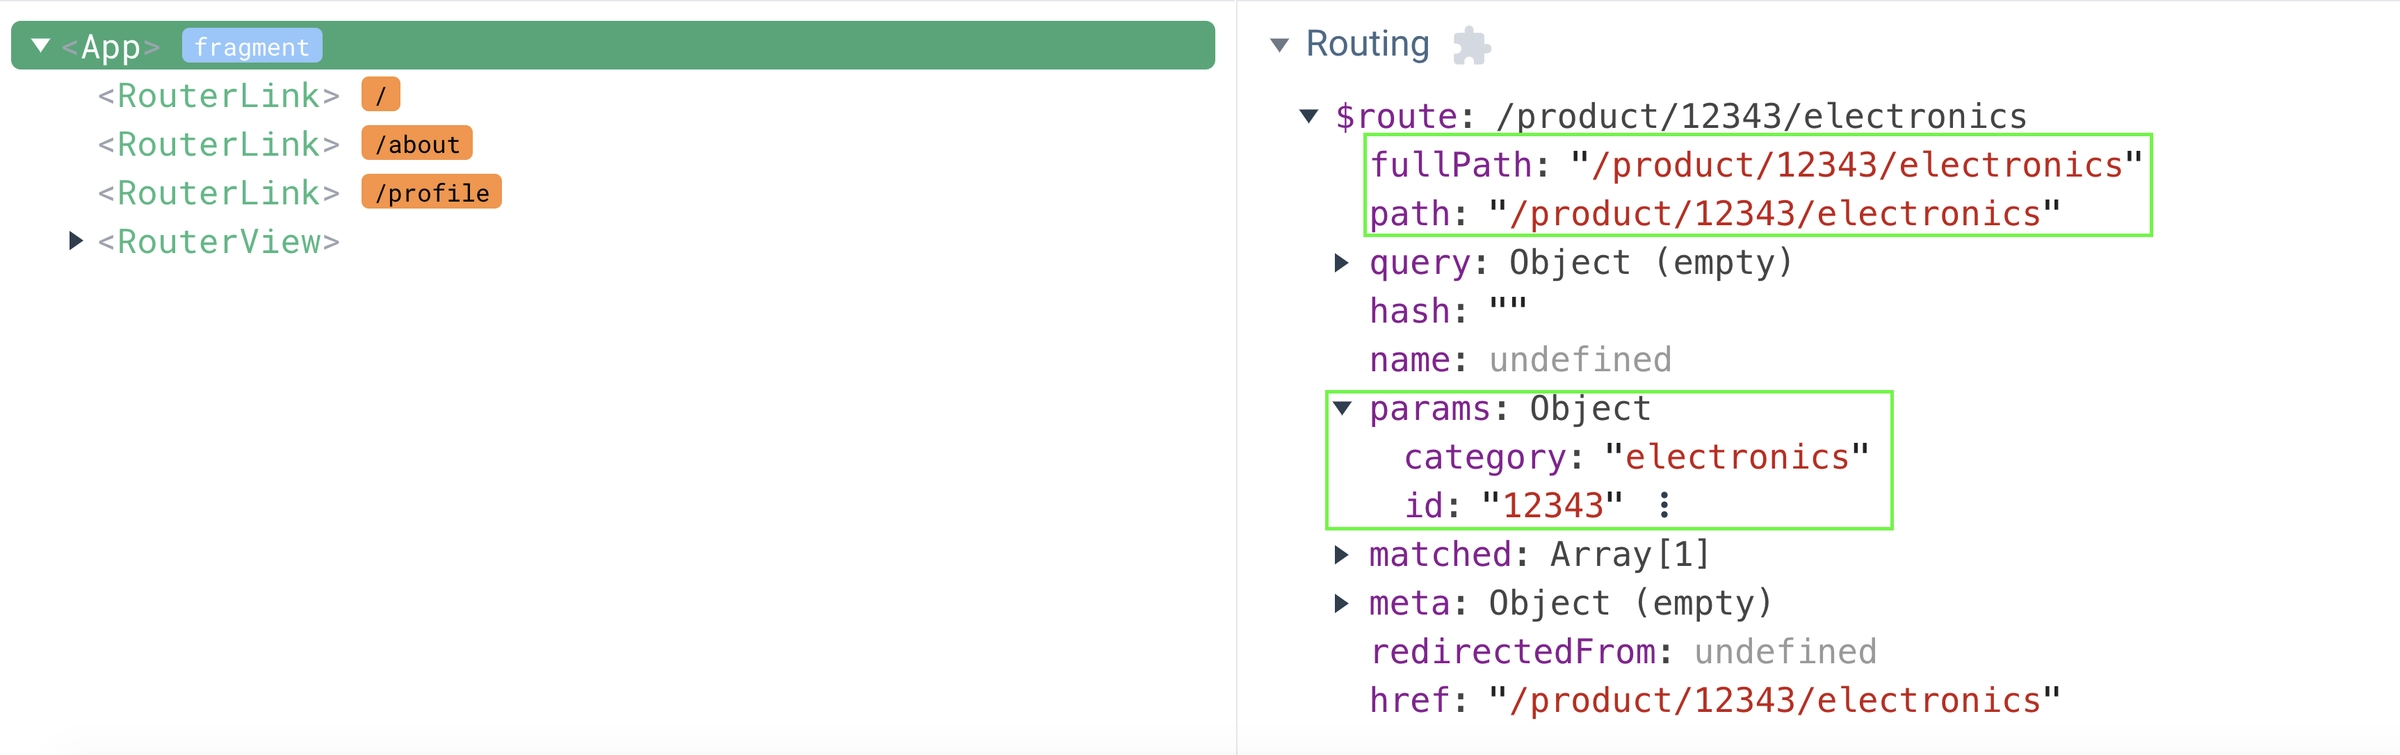
]Instead of one param :id, now we are specifying two params. Now let’s go the path http://localhost:8080/product/12343/electronics and open up the Vue devtools. As you can see from the screenshot below we have now access to params and these params are mapping to specified variable name id and category.
Lazy loading
Let’s talk about lazy loading. This is one of the advanced features that Vue Router provides out of the box. Let’s open up our devtools and observe the js tab.
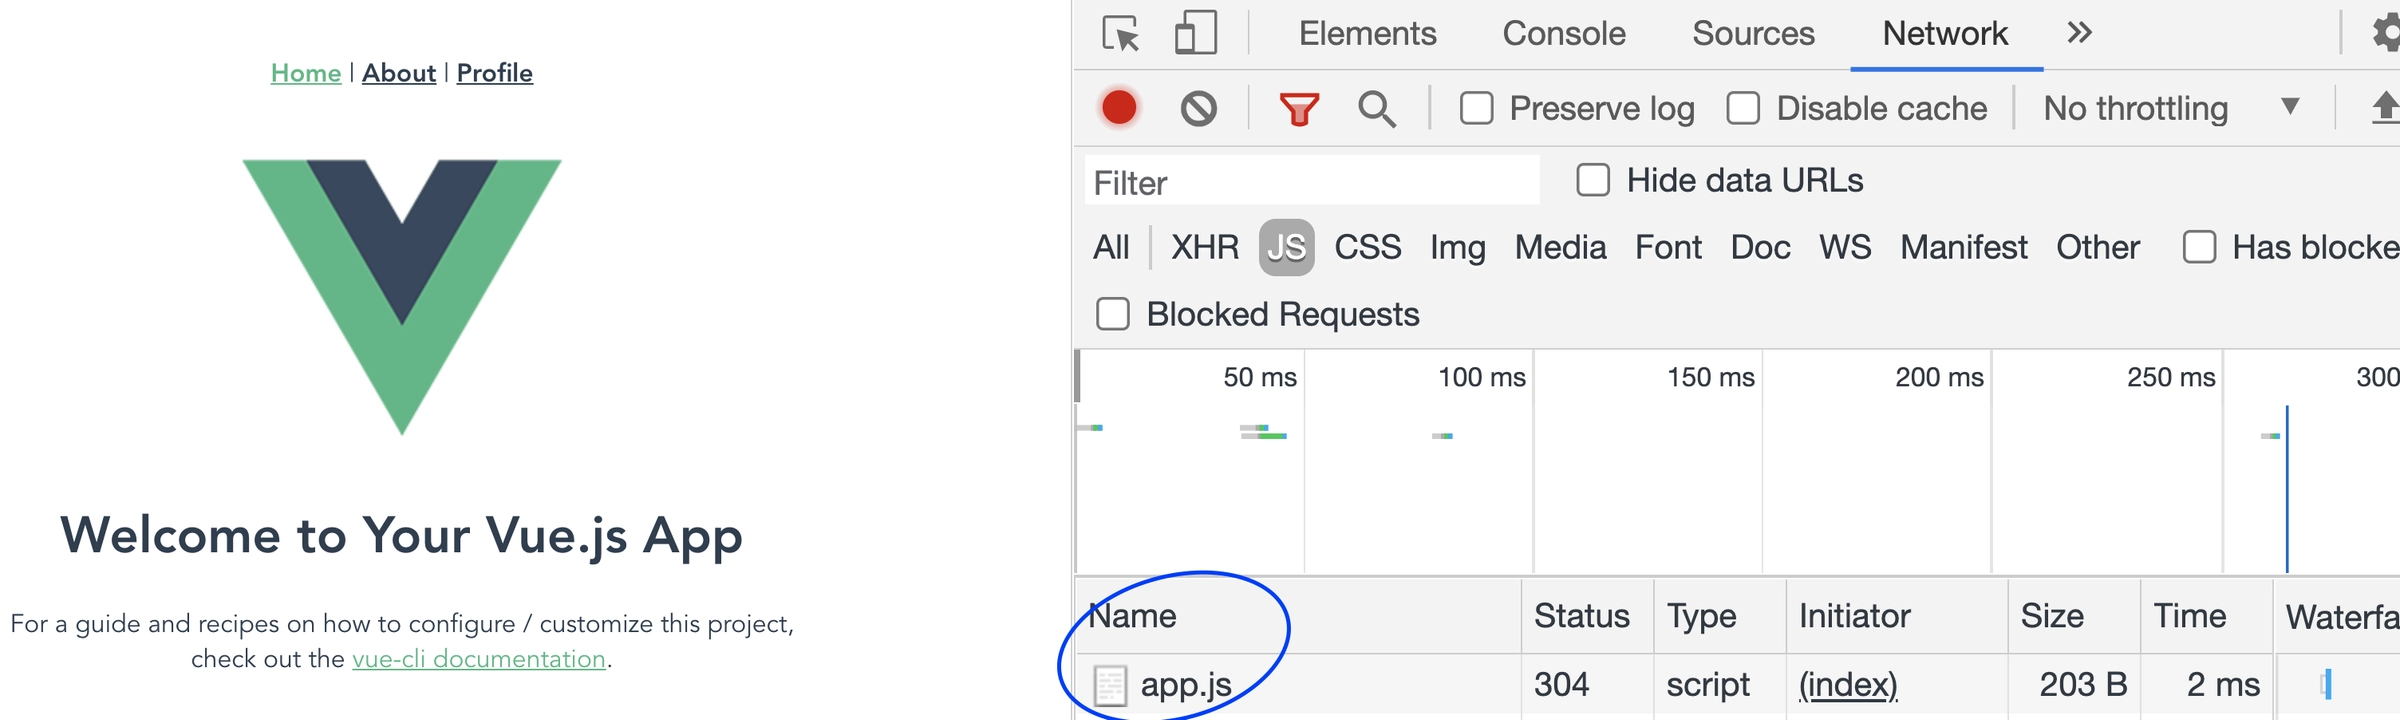
You can see that when we load the application for the first time it loads an app.js script. When you navigate to /profile route or /product route you can see no new javascript is being loaded. This is because all the JavaScript code for those components was already loaded with app.js. In a smaller application, this is not a problem. However, what if we have a large application. In that case, loading all the JS code in one go can make the page load time significantly longer. Lazy loading is used to avoid this.
When we lazy load, we load only the parts we need, when we need them.
    // router/index.js
    const routes = [
      {
        path: '/',
        name: 'Home',
        component: Home
      },
      {
        path: '/profile',
        name: 'profile',
        component: Profile,
      },
      { path: '/product/:id', component: Product },
      {
        path: '/about',
        name: 'About',
        component: () => import('../views/About.vue')
      }
    ]
Take a look at line 17 of router/index.js. Do you recall this from an earlier example? The About component here is being imported with an arrow function. This is an example of lazy loading. Unlike Home, Profile and Product component the About component is not loaded with the app.js. The About component will only get loaded when a user visits the /about route. This is all we have to do to implement lazy load. This lazy loading is being done through Rollup's code splitting feature. Under the hood Vue uses Vite, and vite uses Rollup as a bundler. You can learn more about advanced Vue features such as code splitting, Vite configuration etc. in depth in our Vue 3 Masterclass course.
We can update our code to use lazy loading for each route.
    import { createRouter, createWebHistory } from 'vue-router'
    import Home from '../views/Home.vue'
    const routes = [
      {
        path: '/',
        name: 'Home',
        component: Home
      },
      {
        path: '/profile',
        name: 'profile',
        component: () => import('../views/Profile.vue')
      },
      { path: '/product/:id', component: () => import('../views/Product.vue') },
      {
        path: '/about',
        name: 'About',
        component: () => import('../views/About.vue')
      }
    ]
    const router = createRouter({
      history: createWebHistory(process.env.BASE_URL),
      routes
    })
    export default router
? If you are looking to distinguish yourself as a developer with a deep understanding of Vue then give our Vue 3 Masterclass a shot. In this course, we delve deep into some of the advanced features of Vue such as higher-order functions, code splitting, Vite configuration, creating vue plugins, route guards and much more.
Programmatic Navigation
In our applications, there will be scenarios when we would want to programmatically navigate to another page. Inside our application, we have access to the router instance as $router . We can access it by calling $router. The router instance has a function called push. This function can be used to navigate to different routes. Here are some examples of how it works using Script Setup and Composition API
<script setup>
import { useRouter } from 'vue-router'

const router = useRouter()

// route by route path
router.push('home')

// object
router.push({ path: 'home' })

// named route navigation with parameters
router.push({ name: 'user', params: { userId: '123' } })

// with query params, resulting in /profile?info=some-info
router.push({ path: 'profile', query: { info: 'some-info' } })
</script>
Where to go from here
I hope this article gave you an overview of the different functionalities of Vue Router. We discussed the most important and commonly used features of Vue Router. Feel free to visit the vue router documentation for more in-depth details about the various APIs. Here at VueSchool we have created a completely free course on Vue Router. For more in-depth Vue learning material you can also take a look at our Vue 3 Masterclass course.
We also have a Vue Router 3 For Everyone course for Vue.js 2.
That’s all for today, happy hacking.
Related Courses
Start learning Vue.js for free

Comments
Latest Vue School Articles

Just Released: Nuxt Hub Multi-Vendor and First-Class DB


Vue.js – 2025 In Review and a Peek into 2026
Our goal is to be the number one source of Vue.js knowledge for all skill levels. We offer the knowledge of our industry leaders through awesome video courses for a ridiculously low price.
More than 200.000 users have already joined us. You are welcome too!
© All rights reserved. Made with ❤️ by BitterBrains, Inc.