How to Create an Animated Sprite with VueUse

VueUse is a popular Vue.js library of composables and utility functions that makes interacting with native browser features more intuitive in the context of a Vue.js project.
Vue School has an in-depth course on VueUse, called VueUse For Everyone, that gives you hands on experience using a number of those functions. In this article though, I’d like to focus on the useInterval and useRafFn functions to create an animated sprite. If you’d like to see the same content in video form, checkout this similar lesson from the VueUse for Everyone course.
Animated Sprite
First though, what is a sprite?
A sprite is an image that includes multiple images (frames) that we can cycle through at an interval to create an animation, like this public domain image of a man walking.
When isolated to a single frame and cycling through each one the result is something like this.

Let’s see how we can use VueUse to create this animation, along with the ability to reactively adjust it’s speed, and pause/resume it on demand with simple predefined function calls.
Installing and Using VueUse
First you’ll want to install VueUse to an existing Vue.js project or you can start from this boilerplate Stackblitz project.
npm i @vueuse/coreNext, you should import the useIntervalFn composable from VueUse.
// App.vue
<script setup>
import { useIntervalFn } from '@vueuse/core';
</script>
That’s how easy it is to start using a VueUse composable. As a bonus, since VueUse is fully treeshakable, you can install the whole library and then just cherry pick only the functions you need. This ensures a minimal final bundle size.
The Sprite Markup and Styles
We can just leave useIntervalFn for now and come back to it after we’ve got the HTML and CSS setup for the sprite.
// App.vue
<template>
  <!--div to display the sprite in-->
  <div class="sprite"></div>
</template>

<style>
.sprite {
  /* display the image*/
  background: url(https://freesvg.org/img/1525205509.png) no-repeat;

  /* each frame is 75px wide so limit container to display one at a time */
  width: 75px;

  /* main is roughly 150px tall */
  height: 150px;

  /* the image has some space on top and bottom so this accounts for that */
  background-position: 0px 50%;

}
</style>
Now what we want to do is animate that x-axis of the background position over time, incrementing it -75px pixels every interval to move through the different frames.
/*Step 1*/ background-position: 0px 50%;
/*Step 2*/ background-position: -75px 50%;
/*Step 3*/ background-position: -150px 50%;
/*Step 4*/ background-position: -225px 50%;
/*etc*/
In order to do that, we can create a reactive ref to keep up with which position is active and initialize it to 0.
import {ref} from "vue";
//...
const activePosition = ref(0);
Then we can move the background position to an inline style so this it’s easier to provide a dynamic x position.
<div
    class="sprite"
    :style="background-position: ${activePosition}px 50%;"
  ></div>
VueUse - useIntervalFn
Now all that’s left to do is update that active position at an interval. That’s where VueUse’s useIntervalFn comes in. useIntervalFn takes a callback function and a number defining how often the callback function should run in milleseconds.
useIntervalFn(() => {}, 200);Inside the callback function we can say if the activePosition is greater than -525, than decrement activePosition by 75, which is the width of each frame.
useIntervalFn(() => {
  if (activePosition.value > -525) {
    activePosition.value -= 75;
  }
}, 200);
The reason I chose -525 here is because it’s 7 times -75 which is one less than the number of frames in our animation, plus the 1 frame that starts at 0 accounts for all 8 frames.
else {
    activePosition.value = 0;
}
At this point you should have a sequence of images that look like a walking man when switched out every 200 milliseconds.
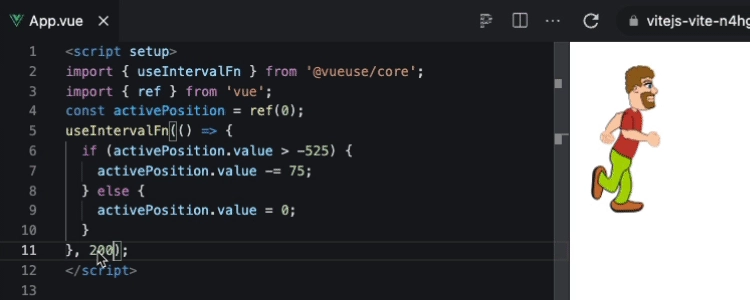
If you wanted to make him walk faster you could just decrease the interval number.
200 -> 100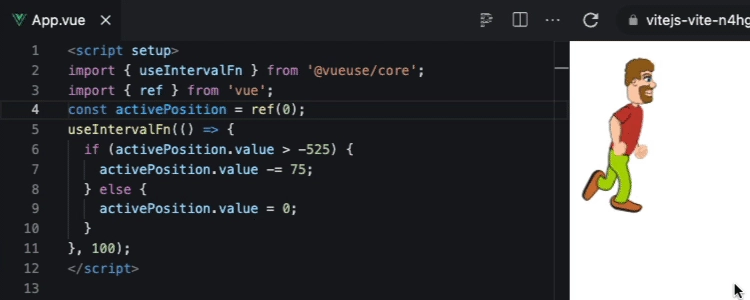
useIntervalFn Perks
At this point, you may be thinking, that useIntervalFn doesn’t bring a whole lot to the table. You could replace the call to useIntervalFn with the browser native setInterval and it would do the exact same thing. But useIntervalFn also comes with some perks.
Reactive speed
First, if you wanted to provide a reactive ref as the interval speed you could.
const speed = ref(100)
useIntervalFn(() => {
  //...
}, speed);
This is handy in the Vue environment as often you’ll being working with reactive data. Not only is the format convenient though, but it actually works as well. If we wanted to reactively update the speed of the man we could bind speed to a range input.
<input type="range" step="20" min="20" max="200" v-model="speed" />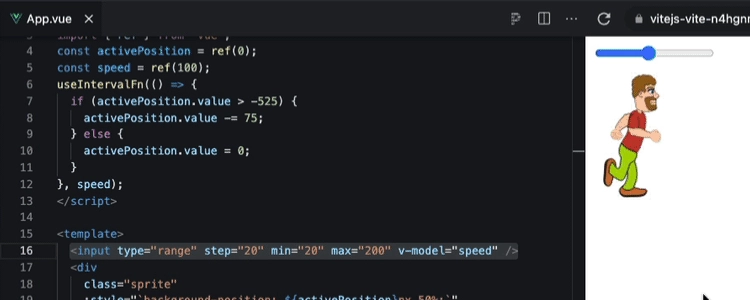
Also, if you wanted to make the input feel a little more intuitive, speeding up the man when moving to the right and slowing him down when moving to the left, you could just reflect the input with CSS.
input[type='range'] {
  transform: scaleX(-1);
}
If you’re inclined to do a little bit more work and ditch v-model for a :value and @input I’m sure you could do this as well but I didn’t want to spend the time on such a solution.
Pause and Resume
Besides making the speed reactive, you can also easily pause and resume the interval by destructuring some handy functions and data out of the call to useIntervalFn.
<script>
const { pause, resume, isActive } = useIntervalFn(() => {
//...
</script>

<template>
<!--...-->
<button @click="isActive ? pause() : resume()">
    {{ isActive ? 'Pause' : 'Resume' }}
</button>
</template>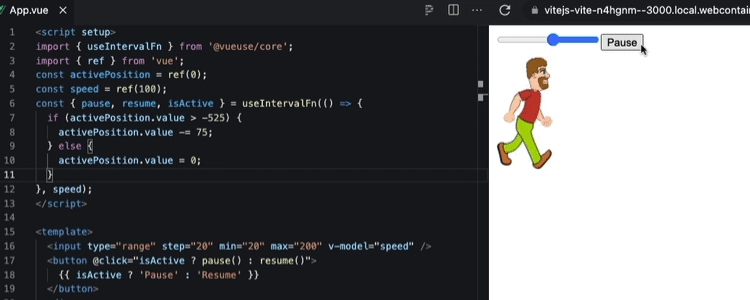
Both such features would require a bit more when using plain ol’ setInterval.
(If you’d like to see how everything is working up to this point you can checkout this Stackblitz project.)
useRafRn
While intervals are ok for simple animations and sites without a lot of animations, requestAnimationFrame is actually the recommended approach for animating sprites. I won’t go into all the reasons why, because honestly, I’m no expert on animations but if you’d like to know more checkout this stack overflow.
So can we use requestAnimationFrame with VueUse? Indeed we can with a function called useRafFn.
import { useRafFn } from '@vueuse/core';Now we’ll need to trade out useIntervalFn for useRafFn and we’ll also remove the interval speed.
const { pause, resume, isActive } = useRafFn(() => {
  if (activePosition.value > -525) {
    activePosition.value -= 75;
  } else {
    activePosition.value = 0;
  }
});
The reason for this, is because requestAnimationFrame doesn’t run on an interval but rather based on the frame rate of your display, typically 60 frames per second.
If you’re following along, you’ll notice now that the guy is just about flying he’s running so fast and the speed slider no longer works. In fact he’s going so fast, I couldn’t properly capture a gif with a high enough frame rate.
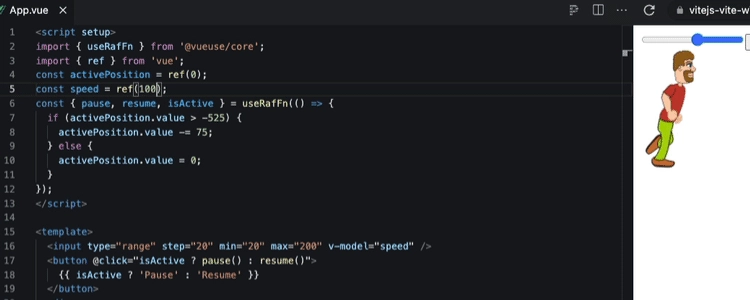
So, how do we control the man’s speed without being able to set an interval?
Once again, I’m not animation expert but the following worked well for me.
//...
// keep up with how many passed frames
const framesComplete = ref(0);
// change speed default to better match new methodology
const speed = ref(10);
const { pause, resume, isActive } = useRafFn(() => {
  // increment framesComplete each animation frame
  framesComplete.value++;
  // return early if frames complete is not a multiple of 10 (or speed.value)
  // so that the postition is not altered until every 10th animation frame
  if (framesComplete.value % speed.value) return;
  //...
});
</script>
This also means, we’d need to update the input range input as well.
<input type="range" step="1" min="1" max="20" v-model="speed" />And with that, our walking man is all setup to work with the more animation friendly useRafFn with the speed controls working just as before.
What about the pause/resume button, does it still work with useRafFn? Indeed it works just the same!
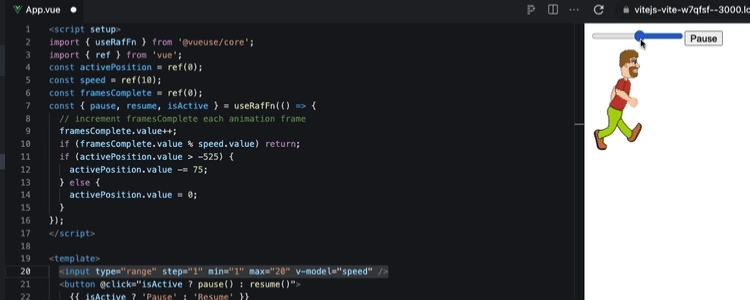
If you’d like to see the full working example, you can play around with it in this Stackblitz project.
Conclusion
VueUse is a powerful utility library that you can quickly install in your Vue.js projects to do all sorts of things, like reactively control sprites. If you are interested in learning more about VueUse’s awesome composables checkout our course: VueUse for Everyone. You can preview the introductory lesson now for free!
Start learning Vue.js for free

Comments
Latest Vue School Articles
Decoding ChatGPT: How It Works and Why It Matters for Developers

Top 5 Vue CSS Superpowers You Might Be Missing

Our goal is to be the number one source of Vue.js knowledge for all skill levels. We offer the knowledge of our industry leaders through awesome video courses for a ridiculously low price.
More than 200.000 users have already joined us. You are welcome too!
© All rights reserved. Made with ❤️ by BitterBrains, Inc.


