Prisma ORM with Nuxt and Supabase

In the world of modern web development, having a reliable and type-safe way to interact with your database is essential. Enter Prisma — a next-generation ORM that makes database access easy, type-safe, and intuitive.
In this guide, we’ll walk through building a complete Nuxt application with Prisma as our ORM and Supabase providing our PostgreSQL database. You’ll learn how to:
- Set up a local development environment with Supabase
- Model your data with Prisma’s schema language
- Generate a type-safe client for database operations
- Create and run migrations to evolve your database
- Seed your database with test data
- Build server API endpoints in Nuxt
- Connect your frontend to those endpoints
- Create a GitHub Actions workflow to deploy migrations to production
Whether you’re new to ORMs or looking to level up your Nuxt stack, this tutorial will give you a solid foundation for building data-driven applications with modern tools and best practices.
Install dependencies
Step one is to install the necessary packages.
npm i prisma @prisma/client @prisma/adapter-pg
npm i supabase tsx --save-dev
Why these packages?
- Prisma, @prisma/client, @prisma/adapter-pg: Your primary ORM tools for defining your data model and interacting with a Postgres database
- Supabase: A powerful Backend-as-a-Service platform that provides PostgreSQL databases (we’ll use it primarily for its database features)
- tsx: A TypeScript execution engine that helps run TypeScript files directly (we’ll use it for our database seed script)
Init and Run Local Supabase Instance
Setting up a local development environment with Supabase gives you a fully-featured PostgreSQL database right on your machine—no need to connect to external services during development. Note that this instance does run in a docker container, so make sure you have docker installed and running.
npx supabase init
npx supabase start
After running these commands, Supabase will spin up a local instance with its own web interface for managing your database. This local setup mirrors the production environment, ensuring a smooth transition when you’re ready to deploy.
The web interface is especially handy for visually inspecting your data, running raw SQL queries, and testing database operations during development.
You can find the url of the web interface by running the following commmand and copy/pasting the provided “Studio URL” from the output.
npx supabase statusModel the Data in schema.prisma
Now that we have our dependencies installed and our local dev environment setup, we can model the data in our database. This is done in the schema.prisma file.
schema.prisma is where you’ll describe your database tables, their relationships, and their fields/columns.
Create a prisma/schema.prisma file with your data model:
// prisma/schema.prisma

// The TS client will be generated in the `prisma/generated` directory
generator client {
    provider = "prisma-client"
    output   = "./generated"
}

// The database provider is postgresql and the url is fetched from the DATABASE_URL environment variable
datasource db {
    provider  = "postgresql"
}

// Model all the data with a `model` for each table

model Posts {
    id        String     @id @default(uuid())
    title     String
    content   String?
    published Boolean    @default(false)
    createdAt DateTime   @default(now())
    Comments  Comments[]
}

model Comments {
    id      String @id @default(uuid())
    content String
    post    Posts  @relation(fields: [postId], references: [id])
    postId  String
}
Our model includes two tables:
- A
Poststable for blog posts with fields for title, content, publication status, and creation time - A
Commentstable that has a one-to-many relationship with posts
? Pro tip: Install the Prisma VS Code Extension for syntax highlighting, formatting, and auto-completion that makes working with schema files much more pleasant.
Provide The Prisma Config
Next, let's configure prisma with the right datasources, tell it where to genereate migrations, look for seed files, and more.
// /prisma.config.ts
import "dotenv/config";
import { defineConfig, env } from "prisma/config";

export default defineConfig({
  schema: "prisma/schema.prisma",
  migrations: {
    path: "prisma/migrations",
    seed: "tsx prisma/seed.ts",
  },
  datasource: {
    url: env("DATABASE_URL")
  },
});
Generate Prisma Client
After defining your model, you’ll need to generate the Prisma Client — this is a type-safe query builder that’s customized to your database schema and can be imported into your project ts or js files:
First, add the script to your package.json:
// package.json
"scripts": {
  "prisma:generate": "prisma generate"
}
Then run:
npm run prisma:generate(You could have run npx prisma generate directly, but defining as a script in your package.json is a good way to document the command.)
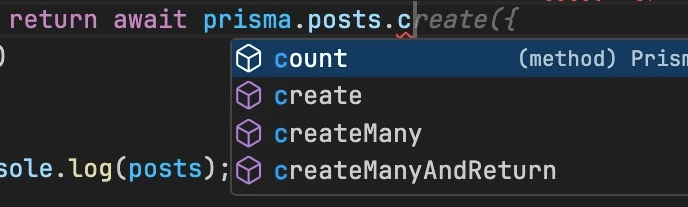
This command analyzes your schema and generates TypeScript types and query methods specific to your models. The output goes to the location specified in your schema.
The generated client provides type-safe functions for database operations, giving you autocomplete suggestions and catching type errors at compile time—a huge productivity boost compared to writing raw SQL!
Hook Up the Database to Prisma
Now that we have our model defined and the client generated, we need to connect Prisma to our database:
- Ensure your
datasourceis properly defined inprisma.config.ts(we did this earlier) - Create a
.envfile with your database connection string:
// .env
// Note the variable name matches the url in the datasource property in prisma.config.ts
DATABASE_URL=postgresql://postgres:postgres@127.0.0.1:54322/postgres
For local development with Supabase, you can get this URL from the output of the npx supabase status command (it’s the DB URL). When you’re ready to deploy, you’ll replace this with your production database URL.
Run Database Migrations to Create the Tables
The project code side of prisma is ready to go but now we need apply the schemas we’ve defined in the code to the database. This is done with migrations.
Migrations are how Prisma tracks and applies changes to your database schema. This means your actual database tables will mirror your schema file exactly. Let’s set up and run our first migration:
Add the migration script to package.json:
// package.json
"db:migrate": "prisma migrate dev"
Then run:
npm run db:migrateYou’ll be prompted to give your migration a name — something like “initial_setup” or “add_posts_and_comments_tables” works fine.
This command:
- Compares your Prisma schema to the database state
- Generates SQL to create your tables
- Executes that SQL against your database
- Creates a migration record in a special table to track changes
Migrations are great for team environments and deployment pipelines, as they ensure your database structure evolves consistently across all environments.
If you want to iterate more quickly with database changes during local development, you can also use the prisma db push command. This will push your changes to the database without creating a migration record.
Seed the Database
The database structure is now ready but we’re missing table data to test with. This is where seeding comes in.
Seeding fills your database with initial data, which is super helpful for development and testing. How do we seed the database?
First, we’ll configure package.json with a script that runs the prisma db seed command.
"scripts": {
  "db:seed": "prisma db seed"
},
Next, we’ll create the seed file at prisma/seed.ts (this file location was configured in the prisma.config.ts earlier. This imports the generated prisma client and uses it in a type-safe way to seed our database initial dummy post data. This seed script creates 10 sample blog posts with sequential titles and dates but you can customize this to create whatever initial data makes sense for your application and even use Faker.js to generate random data.
// prisma/seed.ts
import "dotenv/config";
import { PrismaPg } from "@prisma/adapter-pg";
import { PrismaClient } from "./generated/client";

const adapter = new PrismaPg({
  connectionString: process.env.DATABASE_URL!,
});
const prisma = new PrismaClient({ adapter });

async function main() {
  await prisma.posts.deleteMany();

  const posts = await Promise.all(
    Array.from({ length: 10 }).map(async (item, i) => {
      return await prisma.posts.create({
        data: {
          title: `Post ${i + 1}`,
          content: `Content for post ${i + 1}`,
          createdAt: new Date(Date.now() + i * 24 * 60 * 60 * 1000),
        },
      });
    })
  );

  console.log(posts);
}

await main();
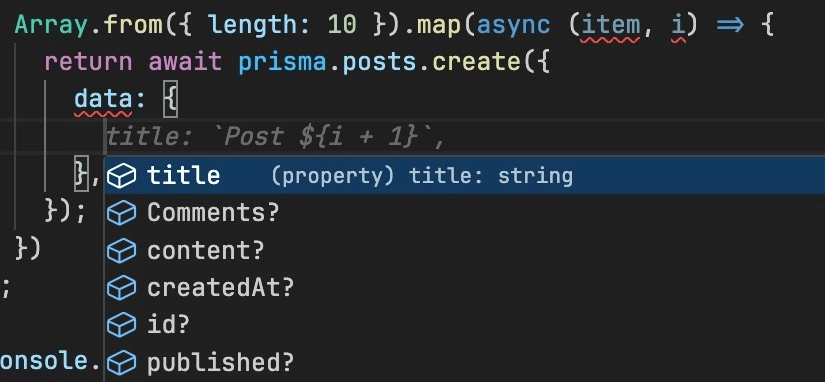
Notice that using the prisma client is 100% type safe! It has type safe methods for creating, reading, updating, and deleting data, plus more!
Also, since the prisma client knows your schema, it knows the data types and will give you autocomplete suggestions.
Lastly, we need to run it to populate our database with initial data.
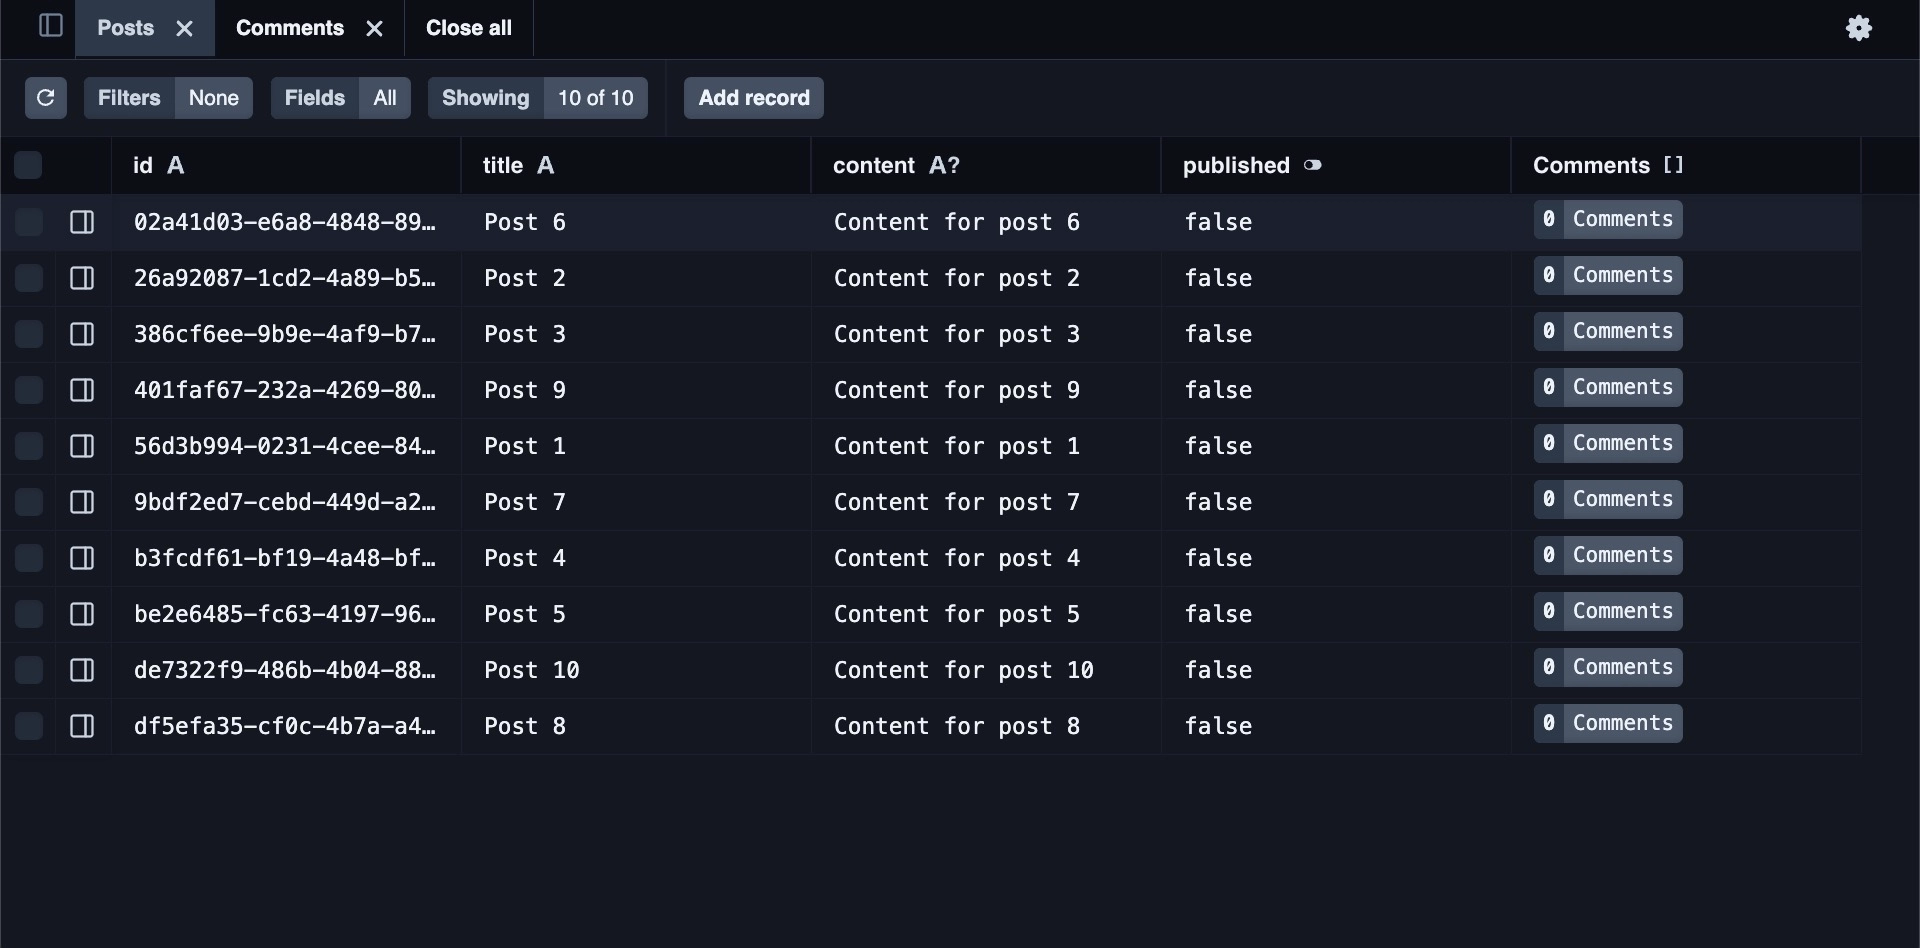
npm run db:seedView Database Tables in Supabase or Prisma Studio
Now that your database has tables and data, you’ll want to inspect it. You have two great options for this:
- You can use Supabase’s web interface to view your database tables:
npx supabase status
# Look for the Studio URL in the output, typically http://localhost:54323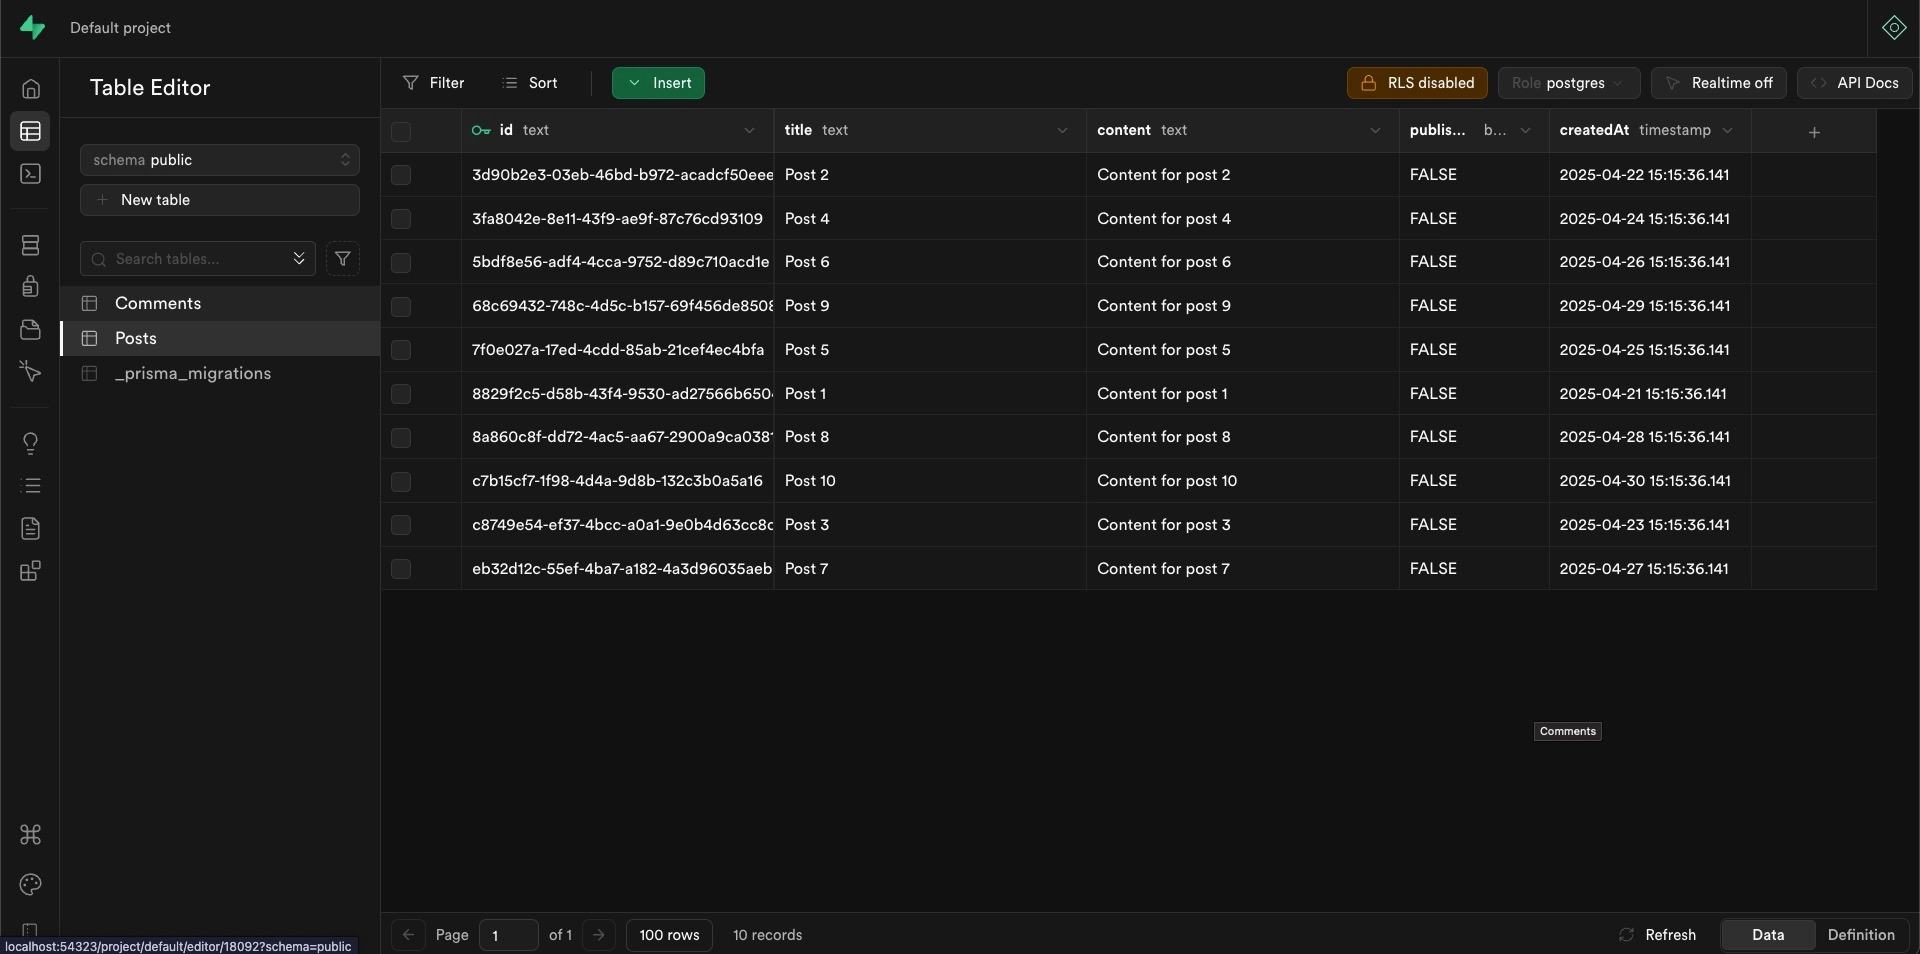
- Or use Prisma’s built-in database browser Prisma Studio:
npx prisma studioPrisma Studio runs on http://localhost:51212 by default and provides a clean, intuitive interface for browsing and editing your data. It’s particularly nice because it understands your Prisma schema’s relationships and formatting rules.
Create a Prisma Client Helper Function
We’re so close to having a fully functioning Nuxt application but we’re still missing one thing. We need a way to access the Prisma Client in our API endpoints and start fetching data from the database in the application layer.
Let’s start by creating a helper function that will give us a consistent way to access the Prisma Client throughout the API endpoints.
// server/utils/prisma.ts
import "dotenv/config";
import { PrismaPg } from "@prisma/adapter-pg";
import { PrismaClient } from "~/prisma/generated/client";

const connectionString = process.env.DATABASE_URL;

if (!connectionString) {
  throw new Error("DATABASE_URL is required to initialize Prisma Client.");
}

const adapter = new PrismaPg({ connectionString });
const prisma = new PrismaClient({ adapter });

export function usePrisma() {
  return prisma;
}
The helper function reuses a single Prisma Client instance rather than creating new ones. This is a performance optimization - having multiple Prisma Client instances could degrade database connection performance and consume unnecessary resources.
Fetch Data from the Database in an API Endpoint
Now that we have an easy and performant way to access the Prisma client, we can use it in our API endpoints to fetch data from the database. Note that we should only use the Prisma client in the server API endpoints (or other server side code within the server directory). Prisma interacts directly with the database, so it’s not suitable for the client side of the application.
// server/api/posts/index.get.ts
import { usePrisma } from "~/server/utils/prisma";

export default defineEventHandler(async () => {
  // add in any guards or auth logic here

  const prisma = usePrisma();

  return prisma.posts.findMany({
    orderBy: {
      createdAt: "desc",
    },
  });
});
This creates a GET endpoint at /api/posts that fetches all posts from the database, ordered by creation date. Nuxt automatically serializes the Prisma response to JSON and handles the HTTP details for you.
You can easily expand this to include filtering, pagination, or relationships by adding more Prisma query options.
Fetch Data from the API Endpoint in the Frontend
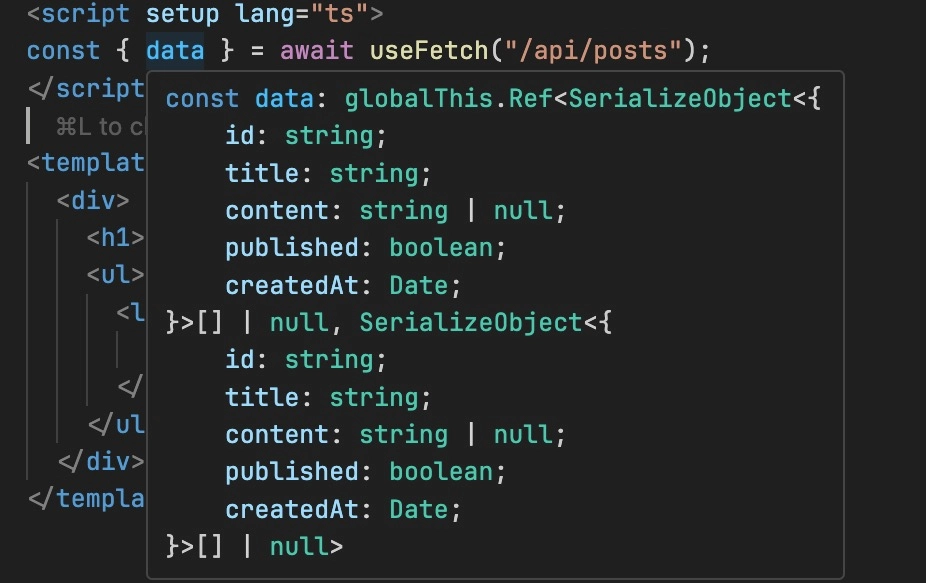
Finally, let’s display our posts in the frontend using Nuxt’s useFetch composable:
// app.vue
<script setup lang="ts">
const { data } = await useFetch("/api/posts");
</script>

<template>
  <div>
    <h1>Posts</h1>
    <ul>
      <li v-for="post in data" :key="post.id">
        {{ post.title }}
      </li>
    </ul>
  </div>
</template>
The useFetch composable handles data fetching with automatic TypeScript typing based on the API response.
Create a GitHub Actions Workflow to Deploy Migrations to Production
Now that everything works locally, we can create a GitHub Actions workflow to deploy migrations in production. Make sure you have a GitHub repository for your project and have a hosted Supabase project on supabase.com.
// .github/workflows/database-migrations.yml
name: Database Migrations
on:
push:
paths:
- prisma/migrations/**
branches:
- main
workflow_dispatch:
jobs:
migrate:
runs-on: ubuntu-latest
steps:
- uses: actions/checkout@v3
- name: Setup Node.js
uses: actions/setup-node@v3
with:
node-version: "latest"
cache: "npm"
- name: Install dependencies
run: npm ci
- name: Run migrations
run: npx prisma migrate deploy
env:
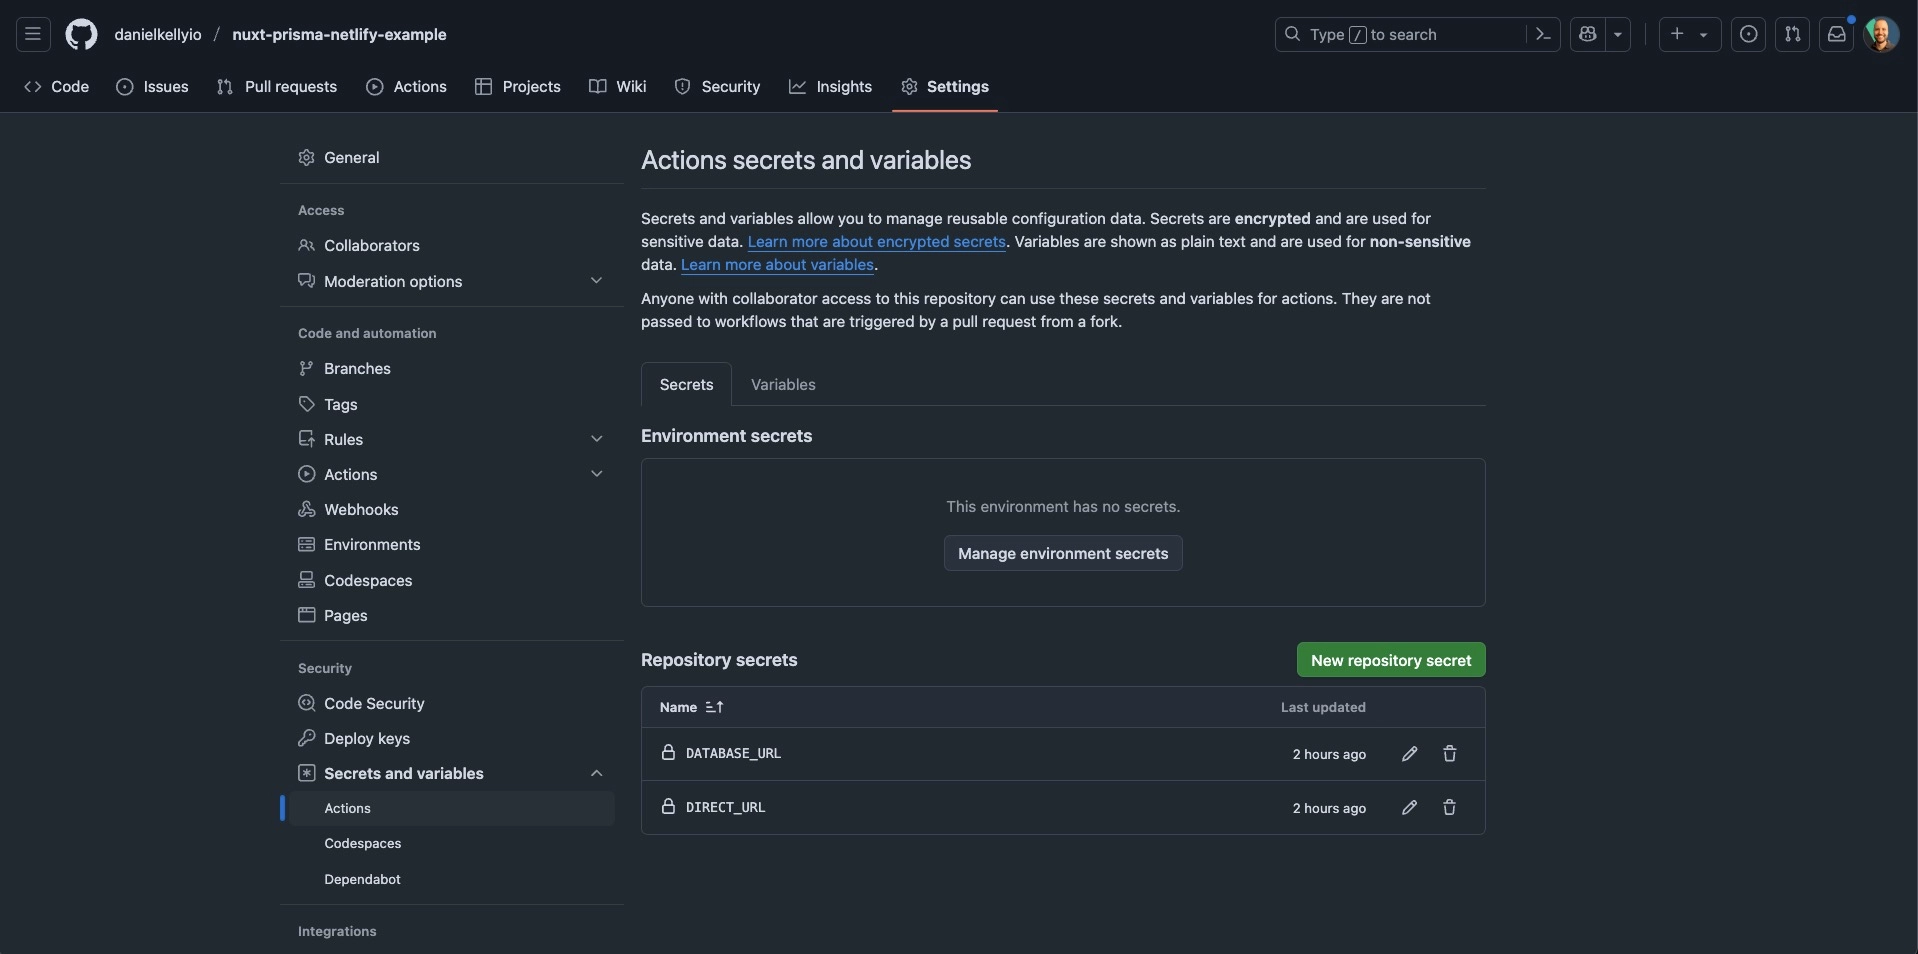
DATABASE_URL: ${{ secrets.DATABASE_URL }}Notice that we have a DATABASE_URL environment variable. We’ll need to add these to our repository secrets. You can do that by going to the repository settings and adding them to the Secrets and Variables > Actions section.
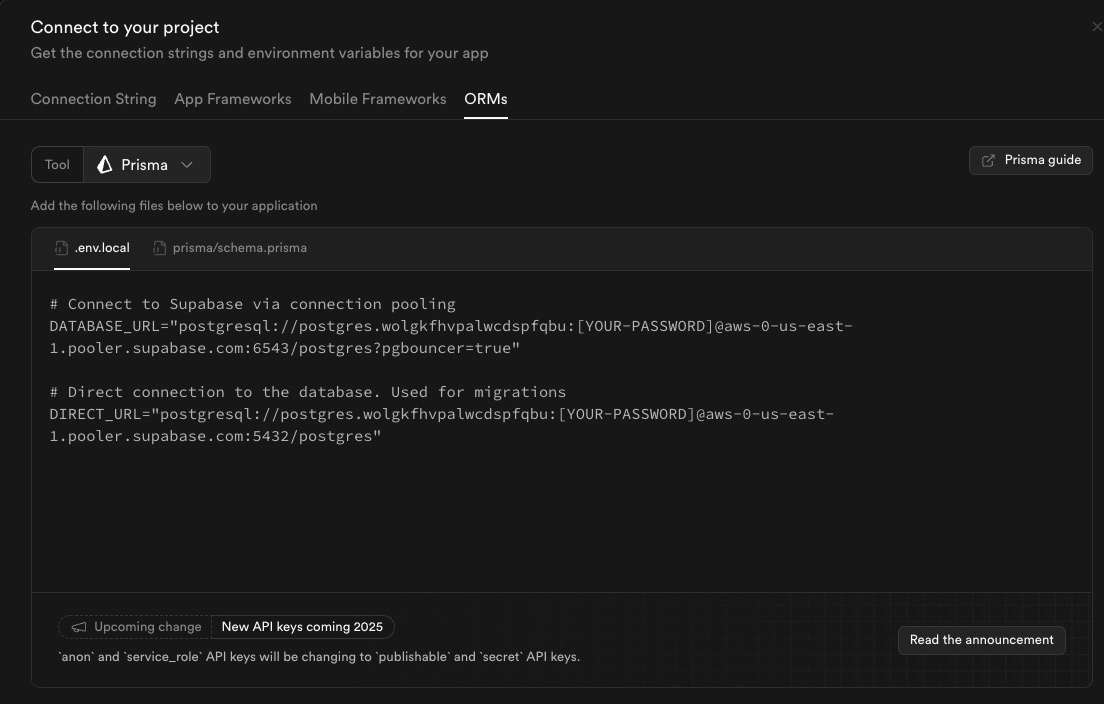
The value for this variable can be found in the dashboard of your hosted Supabase project when clicking the “Connect” button in the header.
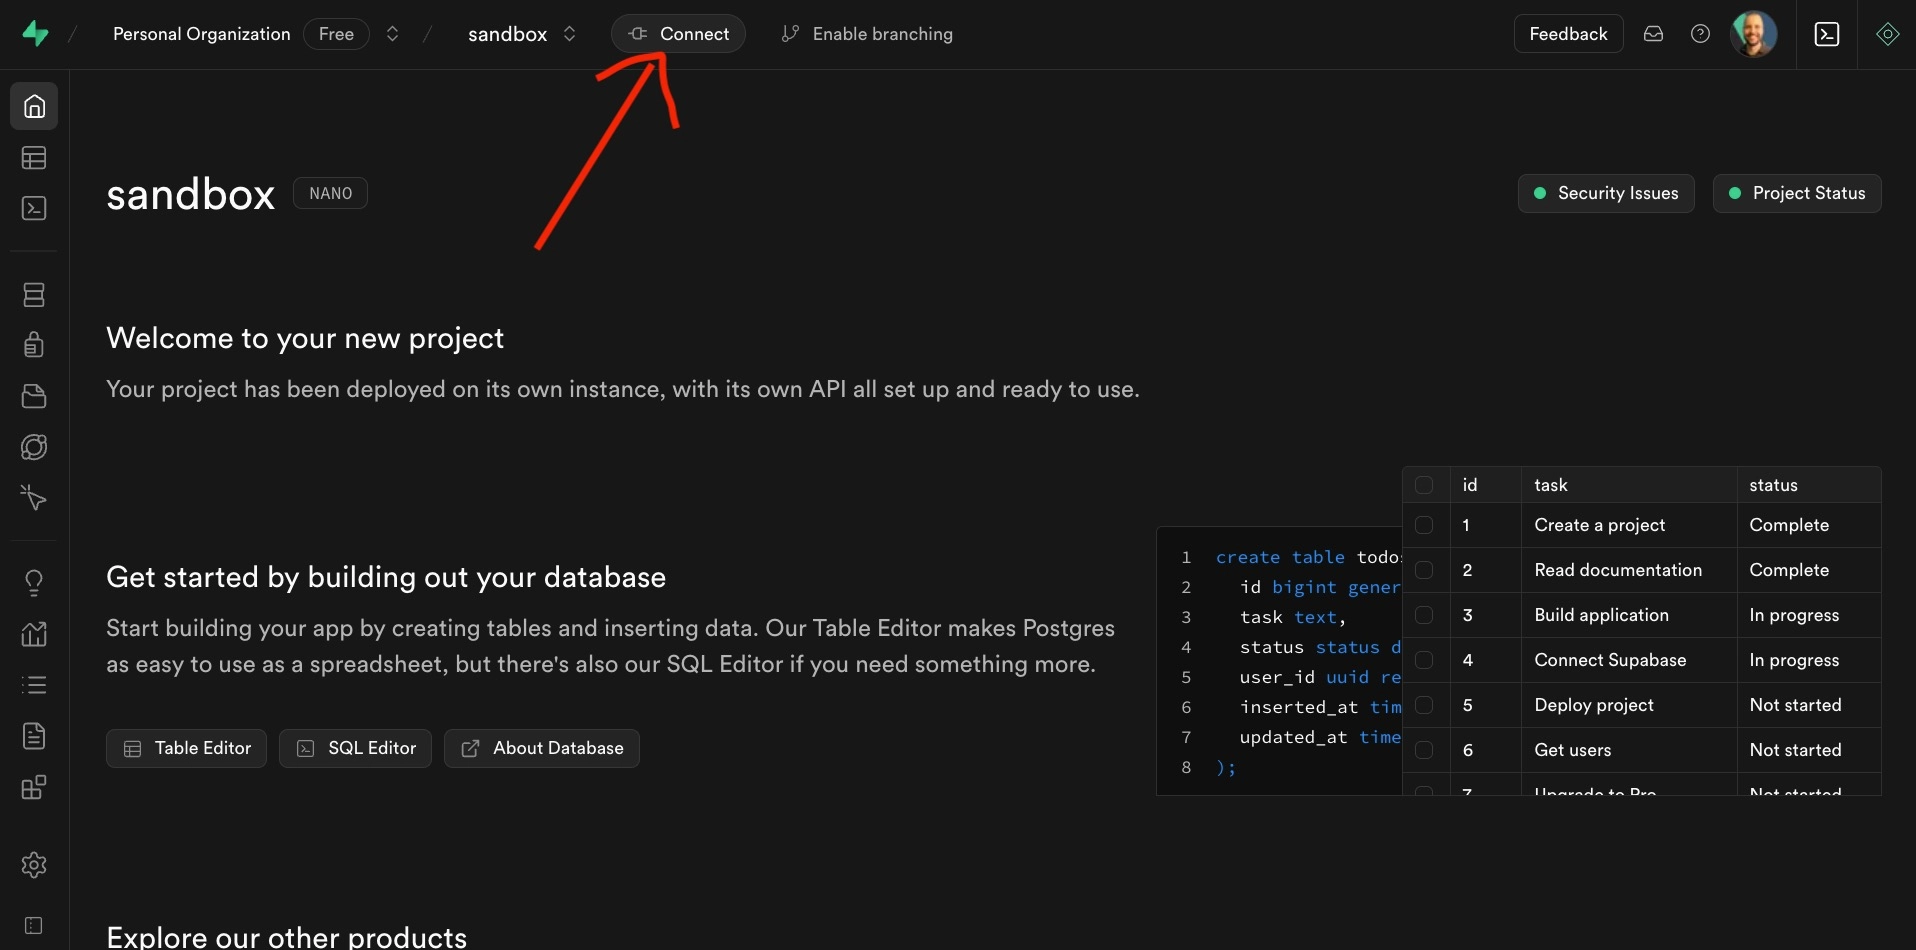
Then in the modal overlay, you can go to ORMs > Prisma to see the value. For your pipeline you'll want to use the DIRECT_URL (for your deployed app you'll use the DATABASE URL).
Now anytime you have a new database migration and push to your Github repo, the action will automatically ensure your production database is on track with the right tables and columns.
Conclusion
You’ve now got a fully functioning Nuxt application with Prisma ORM connected to a PostgreSQL database! ? You can deploy it to platforms like Netlify, Vercel, or any other serverless platform.
Note that as of the time of this writing, there is a bug with Prisma client version 6 that prevents it from working on Netlify. If you’re using Netlify, you’ll need to use version 5 of the Prisma client.
You can find the source code for this project on GitHub. Feel free to use it as a starting point for your own projects and adapt it to your own needs.
Start learning Vue.js for free

Comments
Latest Vue School Articles

Just Released: Nuxt Hub Multi-Vendor and First-Class DB

Vue.js – 2025 In Review and a Peek into 2026
Our goal is to be the number one source of Vue.js knowledge for all skill levels. We offer the knowledge of our industry leaders through awesome video courses for a ridiculously low price.
More than 200.000 users have already joined us. You are welcome too!
© All rights reserved. Made with ❤️ by BitterBrains, Inc.