
How to Compose Layouts in Vue 3 with Vue Router

Use a dynamic layout component driven by route meta for the common case (one layout wraps the page). Reach for named router-views only when a single route needs to fill several sibling slots at once, such as a sidebar and a main panel that both change together.
Add meta: { layout: 'AuthLayout' }
to the route, then render <component :is="layout">
in a wrapper that reads route.meta.layout and falls back to a default when the key is absent.
No. The dynamic layout component is about a dozen lines and needs nothing beyond Vue and Vue Router. Layout plugins and file-based conventions are conveniences for larger apps, not requirements.
Nuxt ships a layouts system: put components in layouts/, wrap pages with <NuxtLayout>, and select one per page with definePageMeta({ layout: 'custom' }). In a plain Vue Router app there is no built-in layouts feature, so you build the small resolver shown above. Verify the Nuxt API against current docs.
Put the layout at a parent route and render children into a <router-view /> inside it (nested routes). The parent stays mounted while children swap, so the sidebar and its state persist across navigation within that section.
Almost every Vue app has a shell: a header, a sidebar, a footer that stay put while the page content swaps underneath. The question is how to model that shell so one route can use the marketing layout, another the app chrome, and a third no layout at all (a bare login screen).
Vue Router gives you more than one way to solve this, and the approach you take depends on the details of the use case. This guide covers the five patterns developers typically pick between in Vue 3:
- a single dynamic layout component driven by route meta
- nested routes with a layout parent (can combine with route meta)
- named router views for more flexible slots
- Vite plugin solutions for file-based routing + layout support
- Built-in layouts with Nuxt
If you want the short answer, start with the decision table, then jump to my recommended solutions.
How to Decide Which Vue 3 Page Layout Approach to Take
| Pattern | Best for | Where the layout lives | Per-route control | Setup effort |
|---|---|---|---|---|
| Dynamic layout component (route meta) | Most Vue 3 + Vue Router apps. Default to this solution. | A small wrapper component that reads route.meta.layout |
Set meta.layout per route |
Low |
| Nested routes + layout parent | Apps with persistent section shells (dashboard, docs). | The route tree itself | Per route subtree | Low to medium |
| Named router-views | One route filling multiple sibling slots (e.g. sidebar + main together). Useful for maximum flexibility to change out content of different slots | Route config components map |
Per matched route | Medium |
| File-based routing + layouts plugin | Plain Vite apps wanting convention over config | Convention (folder or plugin) | File or route meta | Medium |
| Nuxt layouts | Any Nuxt app | layouts/ directory + <NuxtLayout> |
definePageMeta({ layout }) |
Low (built in) |
My Recommend Layout Solutions
Building a plain Vue 3 + Vue Router app in 2026? Use the dynamic layout component driven by route meta. You tag each route with the layout it wants, and one small wrapper resolves it. It stays flat, it is explicit, and it does not force you to nest your route tree just to change a header. This is the default most Vue teams land on, and the example below builds it end to end. Plus you can easily adapt this to work with nested routes.
On Nuxt? Do not reinvent this. Use the built-in layouts/ directory and
Have deeply nested sections that each keep their own persistent shell (a dashboard whose sidebar never re-renders as you move between its pages, and a docs section that has a different layout)? Reach for nested routes with a layout parent. The layout sits at a parent route and its children render into a
Now that you know my recommendations, let’s break down each pattern step by step for a full understanding.
Strategy #1 - Vue Layouts via a Dynamic Layout Component Plus Route Meta
The value of this approach is just how easy it is to apply a layout. It’s literally a single string of route meta.
const routes = [
  { path: '/', component: Home },
  // like this! 👇
  { path: '/login',
      component: Login,
      meta: { layout: 'AuthLayout' }
    },
]
Step 1 - Define the Layout Components
How do we set it up. It doesn’t take long. Step 1 is to create a couple layouts in the directory of your choice. We’ll go with a folder called “layouts”
src/layouts/
    DefaultLayout.vue
    AuthLayout.vue
Each file will define it’s own layout design via html and scoped CSS and most importantly provide a <slot> where the main page content should output.
For example, the default layout might include a header and a sidebar.
<!-- DefaultLayout.vue -->
<template>
  <header>
    <h1>Default Layout</h1>
    <nav>
      <router-link to="/">Home</router-link>
      <router-link to="/login">Login</router-link>
    </nav>
  </header>
  <div class="layout">
    <aside>Sidebar here</aside>
    <main>
      <slot />
    </main>
  </div>
</template>

<style scoped>
aside {
  width: 200px;
  background-color: #f0f0f0;
  padding: 1rem;
}
main {
  flex: 1;
}
.layout {
  display: flex;
  height: 100vh;
  gap: 1rem;
}
nav {
  display: flex;
  gap: 1rem;
  margin-bottom: 1rem;
}
header {
  display: flex;
  justify-content: space-between;
  align-items: center;
  padding: 1rem;
  background-color: #f0f0f0;
}
</style>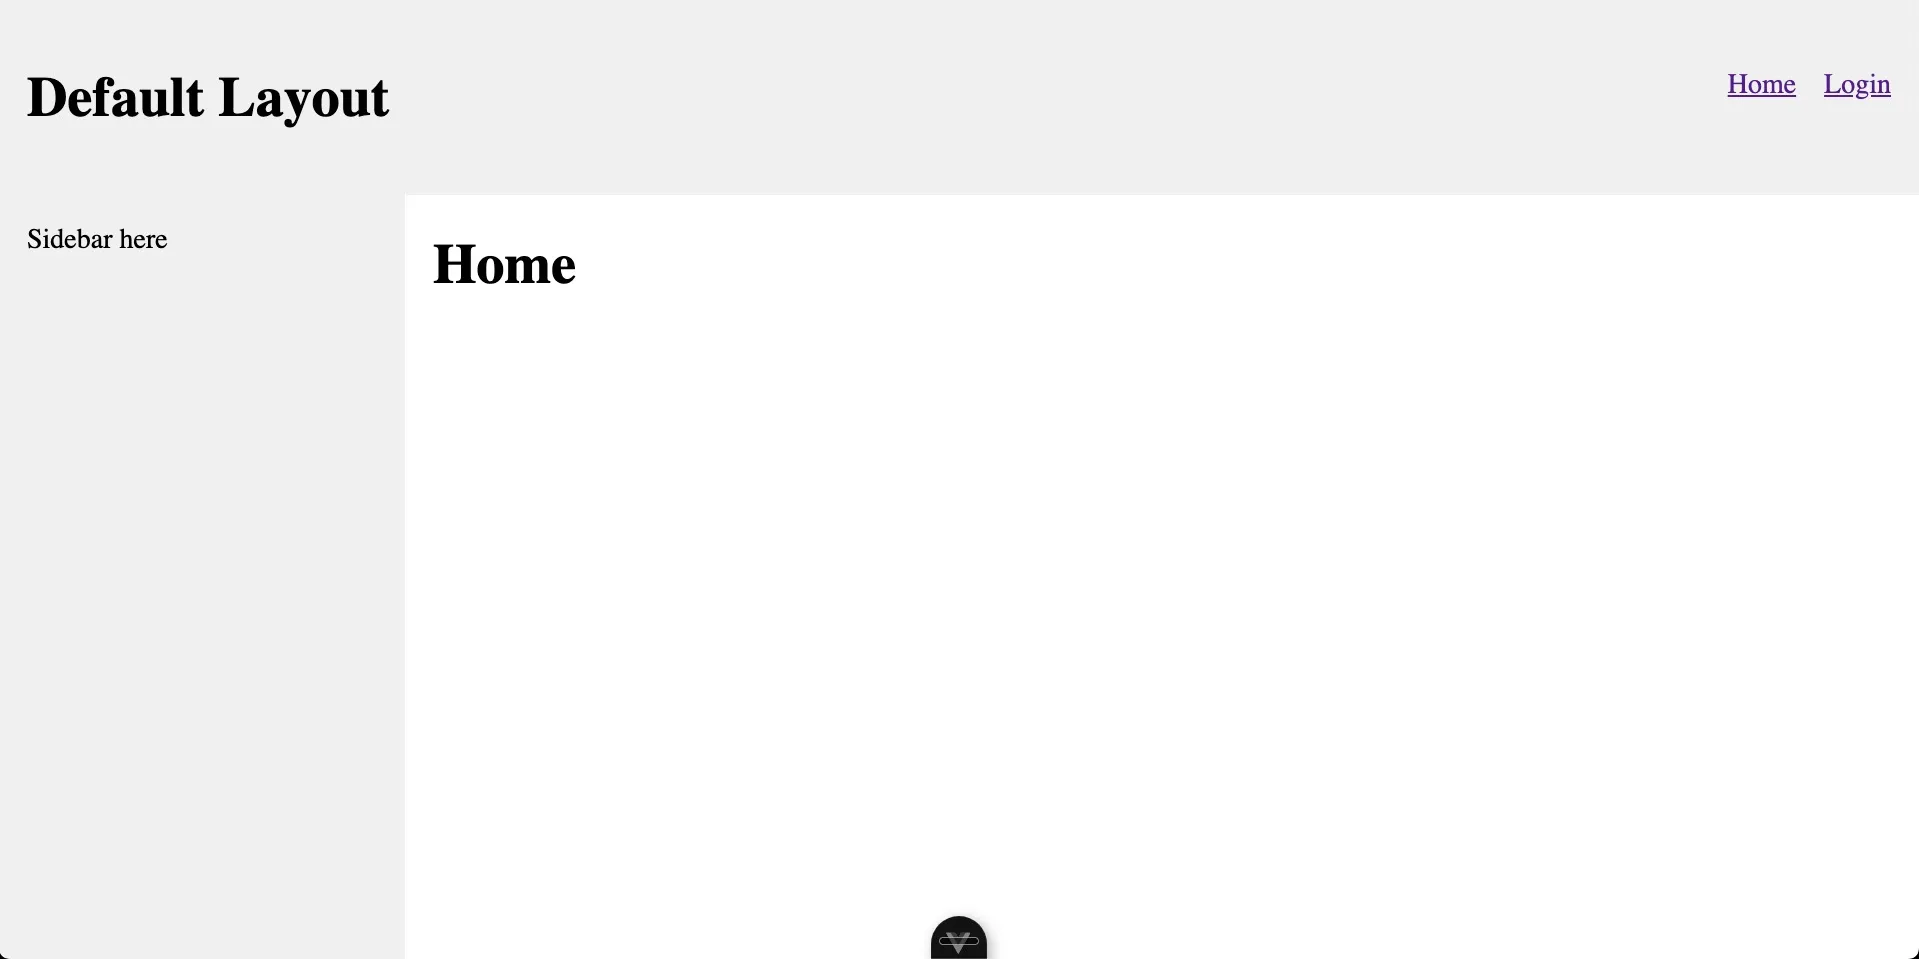
While the AuthLayout might be more minimal and just center the slot content absolutely on the page.
<!-- AuthLayout -->
<template>
  <div>
    <slot />
  </div>
</template>
<style scoped>
div {
  display: flex;
  justify-content: center;
  align-items: center;
  height: 100vh;
}
</style>

Step 2 - Import and Render the Layouts Based on the Route Meta in App.vue
To actually render the layout, in app.vue we register the components by name, load their component definitions asynchronously, and render the correct component dynamically with <component :is="layout"> .
<script setup lang="ts">
import { computed, defineAsyncComponent } from 'vue'
import { useRoute } from 'vue-router'

const layouts = {
  DefaultLayout: defineAsyncComponent(() => import('./layouts/DefaultLayout.vue')),
  AuthLayout: defineAsyncComponent(() => import('./layouts/AuthLayout.vue')),
}

const route = useRoute()
const layout = computed(() => {
  const layoutName = route.meta.layout
  if (layoutName && layoutName in layouts) {
    return layouts[layoutName]
  }
  return layouts.DefaultLayout
})
</script>

<template>
  <component :is="layout">
    <router-view />
  </component>
</template>
Step 3 (optional) - Extract into a AppLayout Component
To clean this up, we could also extract it into it’s own component. How about AppLayout?
<!-- components/AppLayout.vue -->
<script setup lang="ts">
import { computed, defineAsyncComponent } from 'vue'
import { useRoute } from 'vue-router'

const layouts = {
  DefaultLayout: defineAsyncComponent(() => import('@/layouts/DefaultLayout.vue')),
  AuthLayout: defineAsyncComponent(() => import('@/layouts/AuthLayout.vue')),
}

const route = useRoute()
const layout = computed(() => {
  const layoutName = route.meta.layout
  if (layoutName && layoutName in layouts) {
    return layouts[layoutName]
  }
  return layouts.DefaultLayout
})
</script>

<template>
  <component :is="layout">
    <slot />
  </component>
</template>
Then App.vue becomes:
<script setup lang="ts">
import AppLayout from '@/components/AppLayout.vue'
</script>

<template>
  <AppLayout>
    <router-view />
  </AppLayout>
</template>
Step 4 (optional) - Make Layout Route Meta Type Safe
If you’re working in a TS project, you’ll probably want your layout meta data to be type safe. You can do that by extending the RouteMeta interface in env.d.ts
// env.d.ts
/// <reference types="vite/client" />

import 'vue-router'

declare module 'vue-router' {
  interface RouteMeta {
    layout?: 'DefaultLayout' | 'AuthLayout'
  }
}
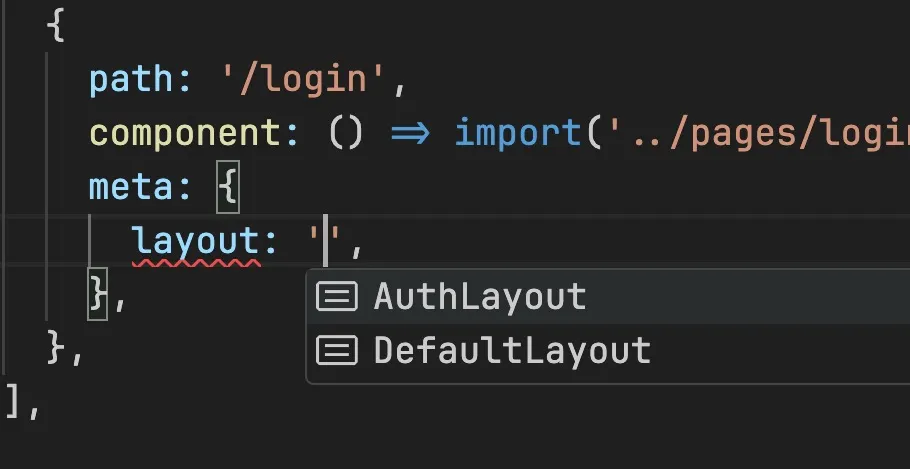
Setting route layout meta now becomes auto-completable and warns you when you try to set a layout that doesn’t exist.
That's the whole approach! You can extend it with as many layouts as you need. It works well anywhere your app has pages that need different layouts, while still letting related pages share the same one. But remember you’ll need to set the layout meta data per page for anything other than the default.
To view a full working example of this you can download the example-1/dynamic-layout-component-and-route-meta branch in the example github repo.
Strategy #2 - Shared Layout for Nested Routes
If your layouts are consistent per group of nested routes, then you might like this approach. It revolves around a layout defined as a parent view component with the child view rendered via <router-view>(instead of a slot). We’ll start with the following file structure:
pages/
  /admin
    _layout.vue
    index.vue
    posts.vue
    users.vue
  /docs
    _layout.vue
    api.vue
    guide.vue
    index.vue
which pairs with route rules that look like this:
import { createRouter, createWebHistory } from 'vue-router'

const router = createRouter({
  history: createWebHistory(import.meta.env.BASE_URL),
  routes: [
    // ...other routes....
    // Note the top most path points at the _layout component
    // meaning each child component will replace the `<router-view>`
    // within the layout
    {
      path: '/admin',
      component: () => import('../pages/admin/_layout.vue'),
      children: [
        // http://localhost:5173/admin
        {
          path: '',
          component: () => import('../pages/admin/index.vue'),
        },
                // http://localhost:5173/admin/posts
        {
          path: 'posts',
          component: () => import('../pages/admin/posts.vue'),
        },
        // http://localhost:5173/admin/users
        {
          path: 'users',
          component: () => import('../pages/admin/users.vue'),
        },
      ],
    },
    // similar setup for /docs
  ],
})

export default router
All that’s left then is to define your layout in the _layout.vue file and place <router-view> where you want the main page content to render.
// src/pages/admin/_layout
<template>
  <div class="admin-layout">
    <header>
      <h1>Admin Layout</h1>
    </header>
    <aside>
      <nav>
        <router-link to="/admin">Admin Home</router-link>
        <router-link to="/admin/posts">Posts</router-link>
        <router-link to="/admin/users">Users</router-link>
      </nav>
    </aside>
    <main>
        <!-- Child components are rendered here
        based on the route visited 👇-->
      <router-view />
    </main>
    <footer>
      <p>Footer</p>
    </footer>
  </div>
</template>

<style scoped>
/* styles needed for layout  */
</style>
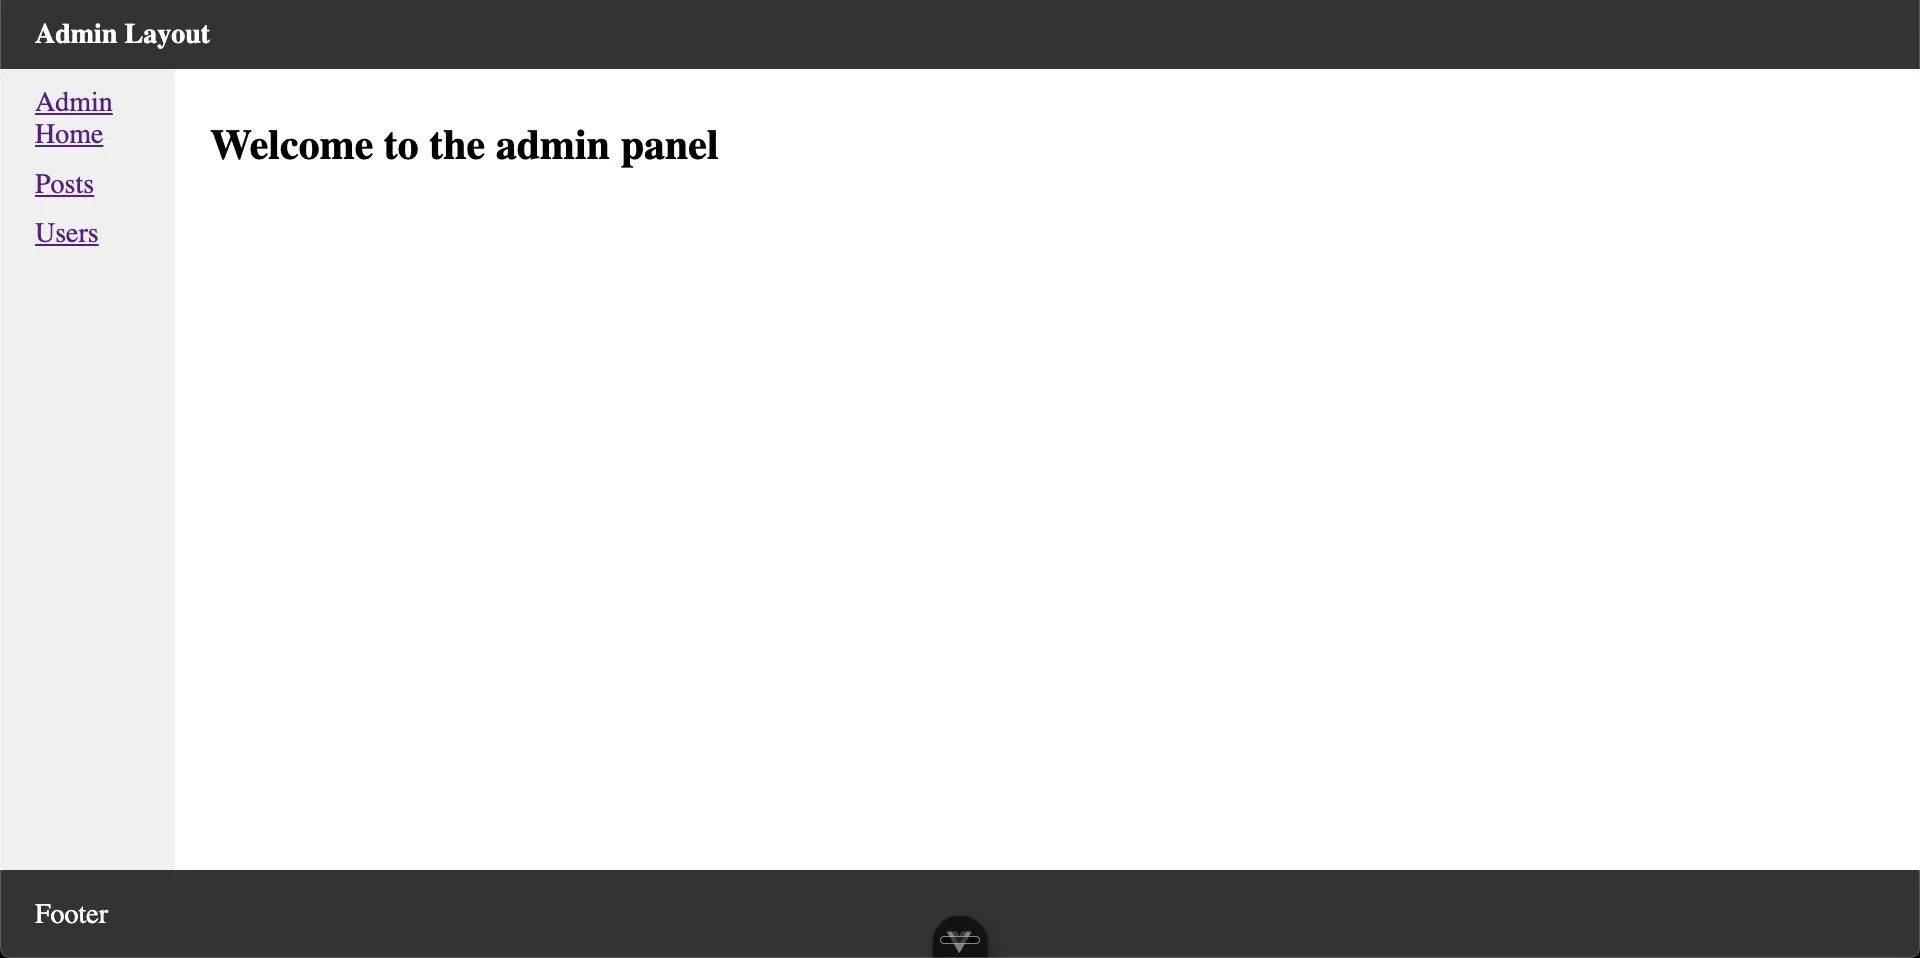
The result is similar to the first approach but now you have a custom layout applied to ALL the nested routes at one time (without a need to put the route layout meta data on each one). In this example, the layout applies to:
- /admin
- /admin/posts
- and /admin/users
Strategy #3 - Composing with Named Views
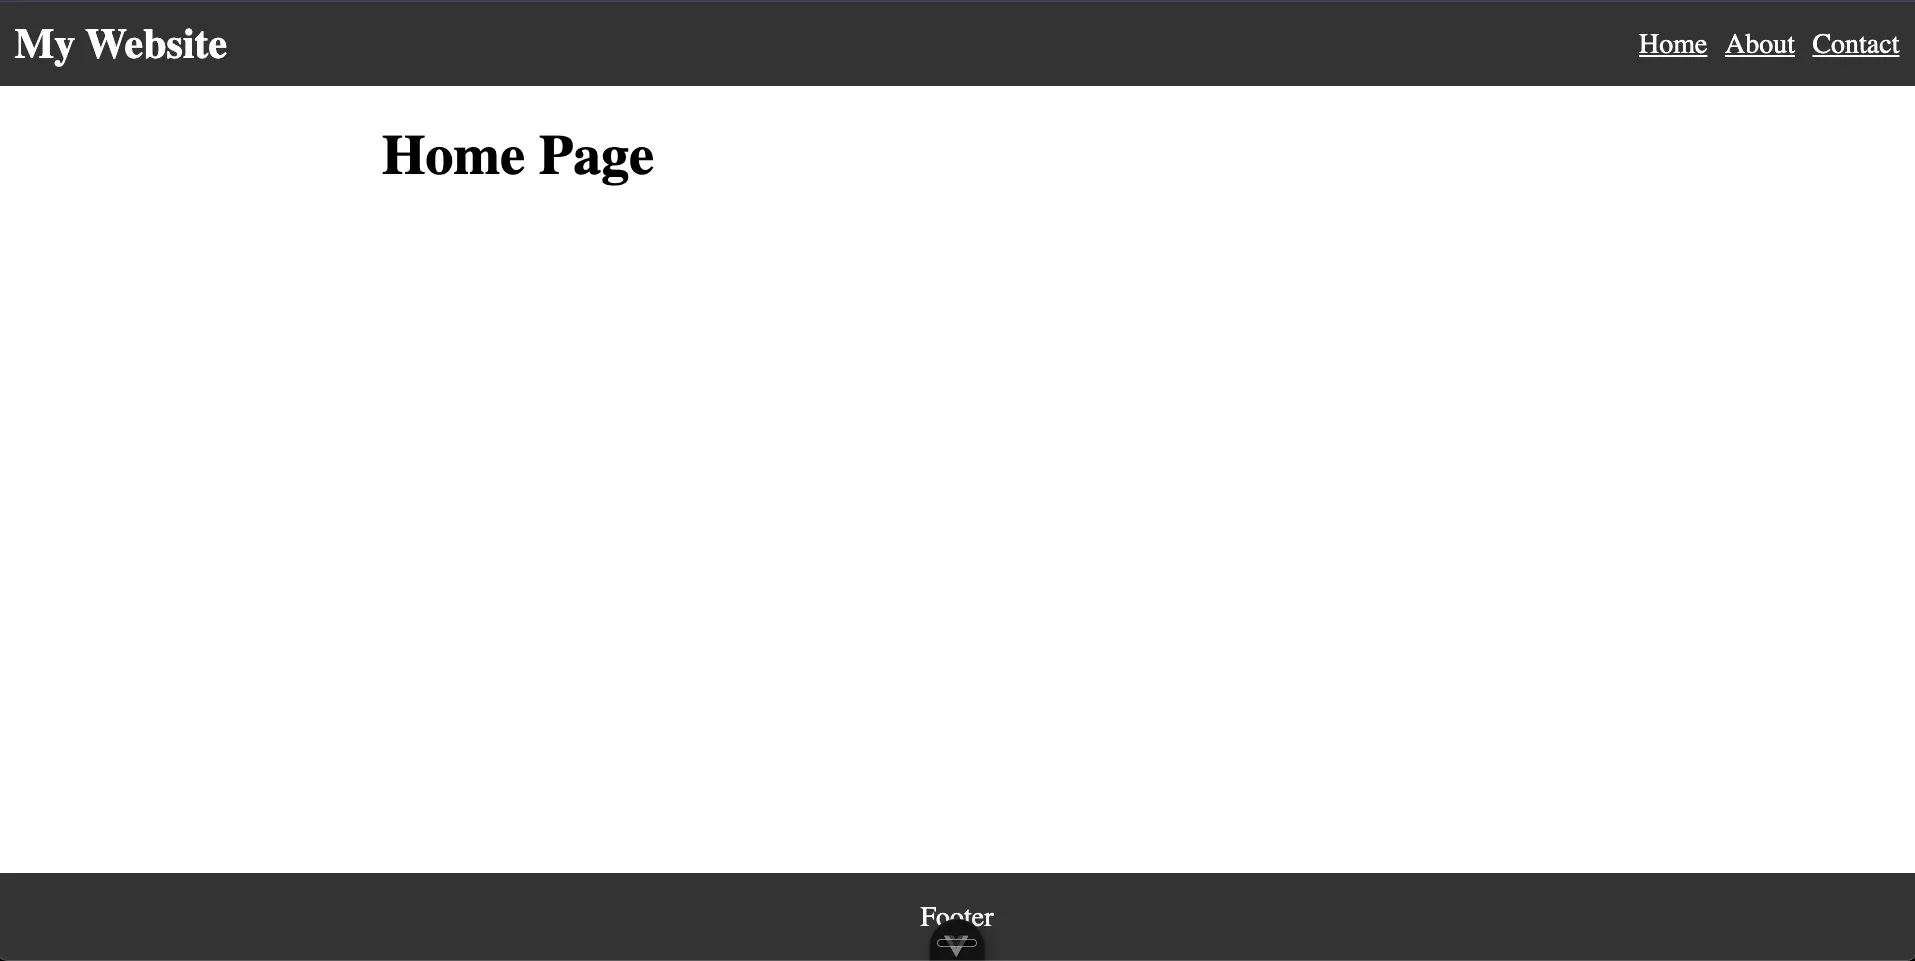
This one you don’t see in the wild very often, but I think it’s worth mentioning (if only for a better understanding of “named views”). It behaves differently from the previous options in that the “areas” of the page are defined once at the App.vue level but the content of each area can be inserted (or omitted) per route.
For example given this code in App.vue
<!-- App.vue -->
<template>
  <div class="app-layout">
    <!-- Header Markup Here... -->
    <!--Notice the name on this router view! 👇-->
    <RouterView name="LeftSidebar" class="left-sidebar"></RouterView>
    <RouterView class="main-view"></RouterView>
    <!-- Footer Markup Here... -->
  </div>
</template>

<style>
/* styles to make the layout practical */
</style>
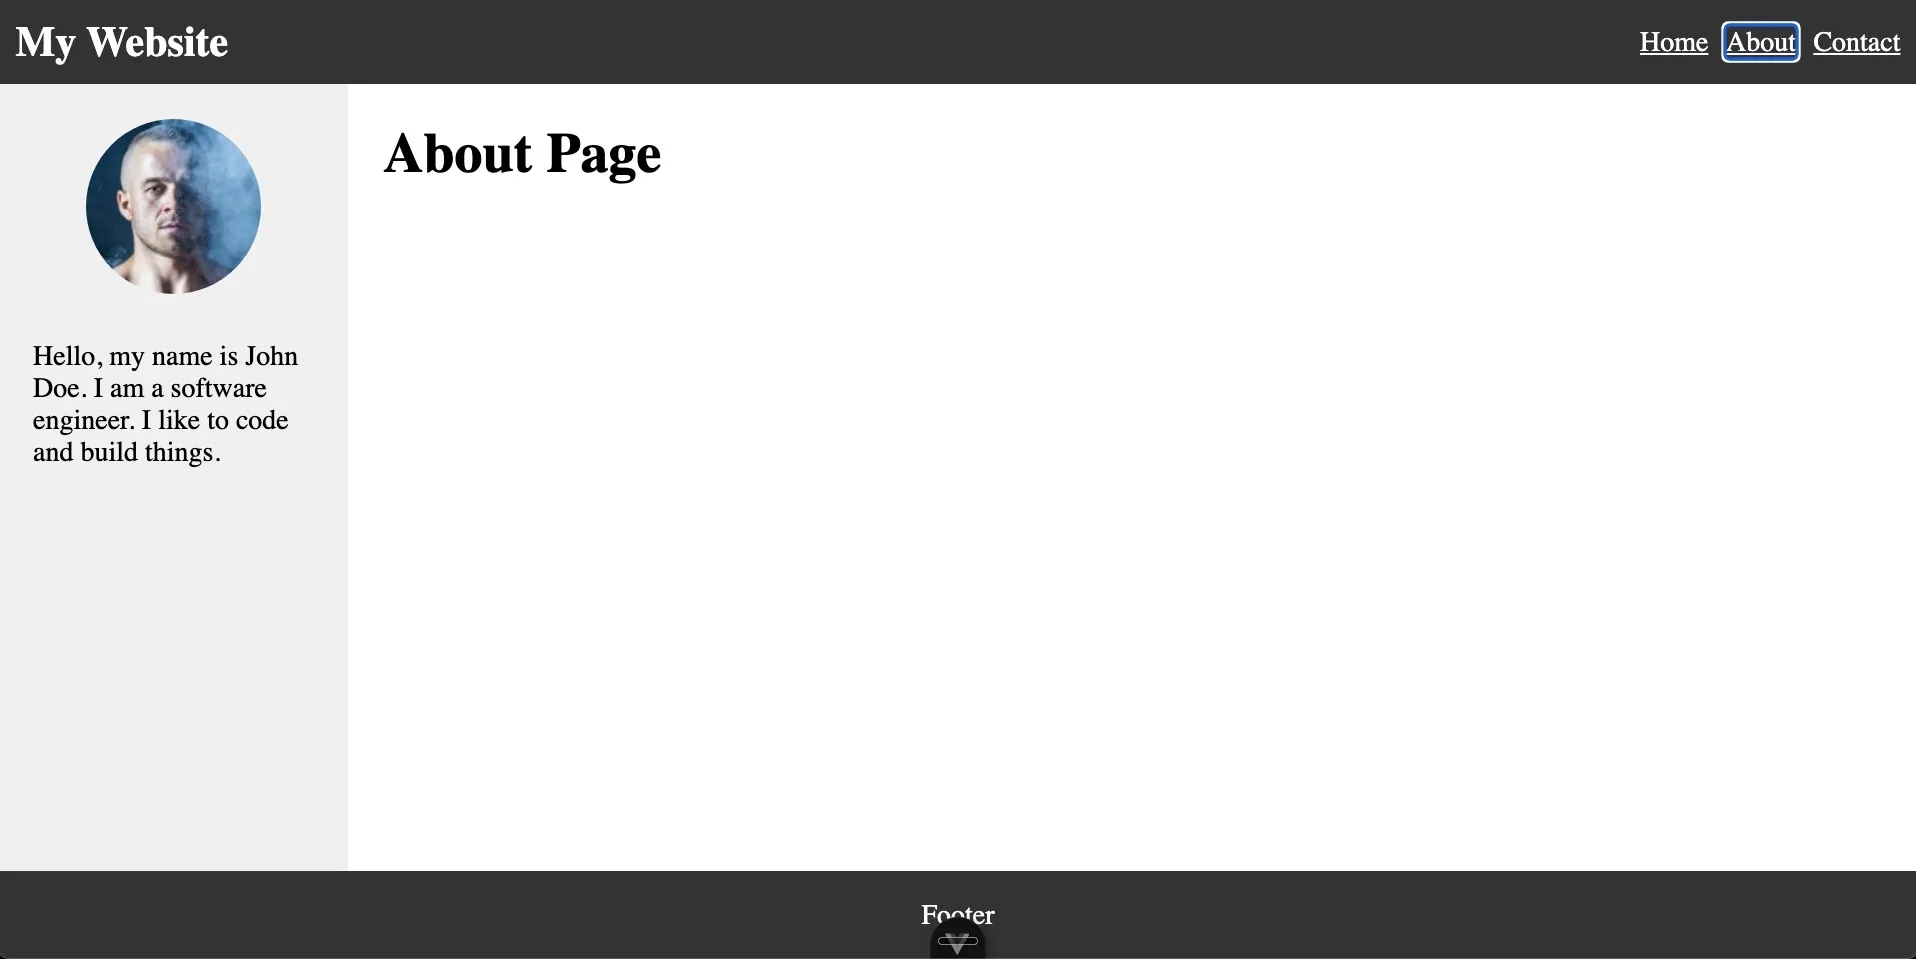
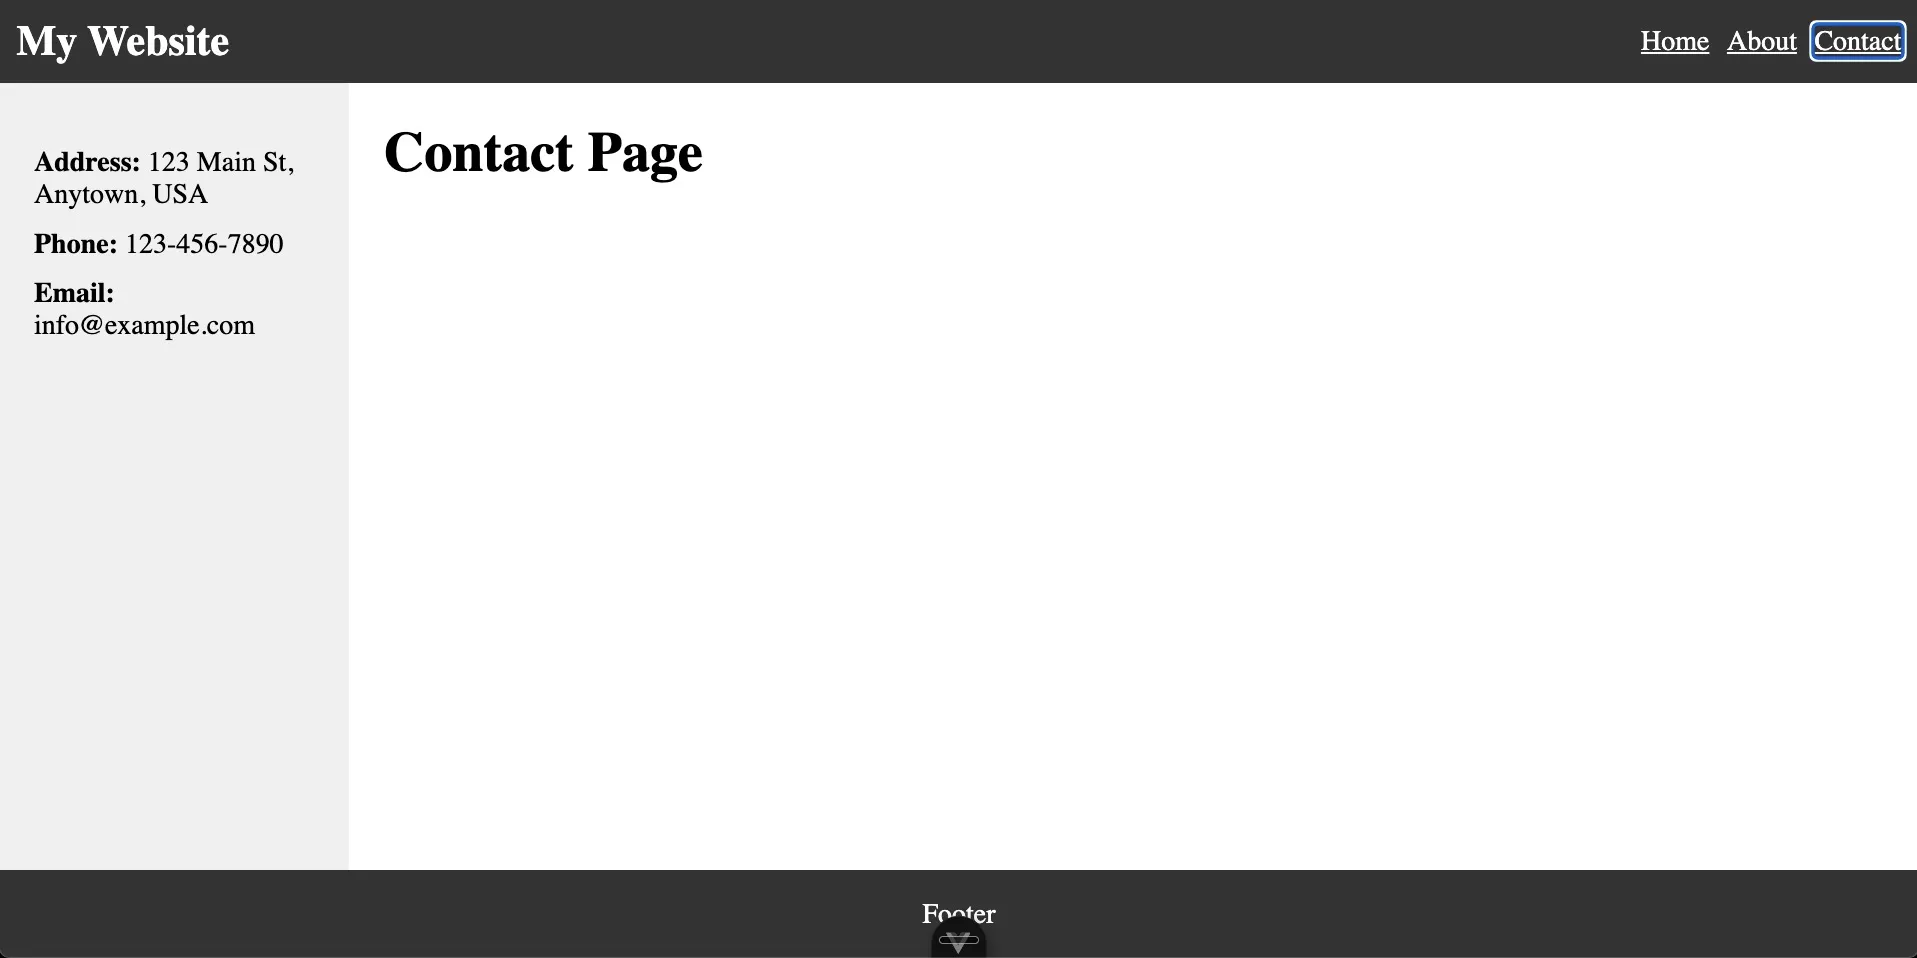
We can define routes with components for BOTH the default router-view and the named LeftSidebar router view
const router = createRouter({
  history: createWebHistory(import.meta.env.BASE_URL),
  routes: [
    {
      // This page provides NO content in the sidebar
      // and the element with the class left-sidebar will NOT be rendered
      path: '/',
      component: () => import('../pages/index.vue'),
    },
    {
      // This page displays the component about-sidbar
      // in the LeftSidebar named view
      path: '/about',
      // Notice it's now components (plural) 👇
      components: {
        default: () => import('../pages/about.vue'),
        // This is inserted into the LeftSidebar named view
        LeftSidebar: () => import('../components/about-sidebar.vue'),
      },
    },
    {
      // This page provides DIFFERENT sidebar content than the about page
      path: '/contact',
      components: {
        default: () => import('../pages/contact.vue'),
        LeftSidebar: () => import('../components/contact-sidebar.vue'),
      },
    },
  ],
})
The result is a homepage with no sidebar
An about page that renders a component about-sidebar in the area where the LeftSidebar view is.
And a contact page rendering a totally DIFFERENT component in the left sidebar
Strategy #4 - Vite Plugins for File Based Routes and Layouts in Vanilla Vue
Nuxt has great support and conventions for pages and layouts (more on that in a minute!). If you want to get similar support in your Vue apps without going all in with Nuxt that’s certainly a possibility.
The latest version of Vue Router ships with a Vite plugin that enables file based routing (ie routes that are auto generated based on their file name and location). We’ve got a complete course about it.
You could pair that Vite plugin with JohnCampionJr/vite-plugin-vue-layouts or stacksjs/vite-plugin-layouts for layout definitions similar to strategy #1 with the ability to apply them on a page component like this:
<route lang="yaml">
meta:
  layout: users
</route>
(Do note, that at the time of writing this article I did have issues with both of these plugins mismatching versions with the latest Vite version.)
Strategy #5 - Use Nuxt Layouts
If you're building on Nuxt, you get all of this for free. Nuxt has a built-in layout system that's really just a formalized version of Strategy #1: a layouts/ directory instead of a hand-rolled layouts object, and <NuxtLayout> instead of a hand-rolled <component :is>. There's no reason to reinvent it.
Step 1 - Define Your Layouts
Create a layouts/ directory at the root of your project. Each file becomes a named layout, and the filename is the name you'll reference later (default.vue is special. It's applied automatically to any page that doesn't specify one).
layouts/
  default.vue
  auth.vue
Just like the manual approach, each layout provides a <slot> for the page content.
<!-- layouts/default.vue -->
<template>
  <div>
    <header>
      <h1>Default Layout</h1>
      <nav>
        <NuxtLink to="/">Home</NuxtLink>
        <NuxtLink to="/login">Login</NuxtLink>
      </nav>
    </header>
    <div class="layout">
      <aside>Sidebar here</aside>
      <main>
        <slot />
      </main>
    </div>
  </div>
</template>
<!-- layouts/auth.vue -->
<template>
<div class="auth-layout">
<slot />
</div>
</template>
<style scoped>
.auth-layout {
display: flex;
justify-content: center;
align-items: center;
height: 100vh;
}
</style>Step 2 - Assign a Layout Per Page
Nuxt's file-based routing means every file in pages/ is already a route, so there's no separate route config to touch. Instead, you set the layout right inside the page component with definePageMeta.
<!-- pages/login.vue -->
<script setup lang="ts">
definePageMeta({
  layout: 'auth',
})
</script>

<template>
  <LoginForm />
</template>
Any page that doesn't call definePageMeta({ layout: ... }) just falls back to default.vue automatically.
Step 3 - Wrap the App with the NuxtLayout Component
Add <NuxtLayout> around your pages in app.vue . That’s it!
<!-- app.vue -->
<template>
  <NuxtLayout>
    <NuxtPage />
  </NuxtLayout>
</template>
Step 4 (optional) - Opt Out of a Layout Entirely
Some pages, a print view, an embed, a bare error page, don't need any layout at all. Set layout: false and render only what the page itself defines.
<script setup lang="ts">
definePageMeta({
  layout: false,
})
</script>
Step 5 (optional) - Switch Layouts Dynamically
If a page needs to change its layout based on runtime state (say, an admin toggle), you can skip definePageMeta and control it with <NuxtLayout :name="..."> directly, or call setPageLayout('other') from within the page.
<script setup lang="ts">
function switchToWideLayout() {
  setPageLayout('wide')
}
</script>
Because this is baked into the framework, you get the same benefits as Strategy #1 (explicit, per-page, low effort) without maintaining your own layout registry, async component map, or App.vue switching logic. If you're on Nuxt, this is simply the right default.
Vue Page Layouts Frequently Asked Questions (FAQ)
Should I use named router-views or a dynamic layout component?
Use a dynamic layout component driven by route meta for the common case (one layout wraps the page). Reach for named router-views only when a single route needs to fill several sibling slots at once, such as a sidebar and a main panel that both change together.
How do I set a different layout per route in Vue Router?
Add meta: { layout: 'AuthLayout' } to the route, then render <component :is="layout"> in a wrapper that reads route.meta.layout and falls back to a default when the key is absent.
Do I need a library to handle layouts in Vue 3?
No. The dynamic layout component is about a dozen lines and needs nothing beyond Vue and Vue Router. Layout plugins and file-based conventions are conveniences for larger apps, not requirements.
How do layouts work in Nuxt compared to plain Vue Router?
Nuxt ships a layouts system: put components in layouts/, wrap pages with <NuxtLayout>, and select one per page with definePageMeta({ layout: 'custom' }). In a plain Vue Router app there is no built-in layouts feature, so you build the small resolver shown above. Verify the Nuxt API against current docs.
How do I keep a layout from re-rendering on every navigation?
Put the layout at a parent route and render children into a <router-view /> inside it (nested routes). The parent stays mounted while children swap, so the sidebar and its state persist across navigation within that section.
Start learning Vue.js for free

Comments
Latest Vue School Articles

5 Component Design Patterns to Boost Your Vue.js Applications

Vibe Coding a Collaborative Editor with Comment Support with Nuxt UI and Jazz

Our goal is to be the number one source of Vue.js knowledge for all skill levels. We offer the knowledge of our industry leaders through awesome video courses for a ridiculously low price.
More than 250.000 users have already joined us. You are welcome too!
© All rights reserved. Made with ❤️ by BitterBrains, Inc.