
Scalable Nuxt 3 Monorepos with PNPM Workspaces

These days, many large companies are using a monorepo to store all their codebase.
A monorepo is a single repository containing multiple distinct projects, with well-defined relationships.
Many tools help you build a monorepo, like Lerna, Yarn Workspace, NX, Turborepo, and PNPM Workspace.
In this article, we’ll explain how to use PNPM workspace to create a monorepo that contains multiple Nuxt 3 applications and how to share components & plugins between these applications!
What is PNPM?
As described on their official website:
PNPM is a Fast, disk space efficient package manager. The goal of using pnpm is to save disk space and boost installation speed
When using npm or Yarn, if you have 100 projects using a dependency, you will have 100 copies of that dependency saved on disk. With pnpm, the dependency will be stored in a content-addressable store, so:
- If you depend on different versions of the dependency, only the files that differ are added to the store. For instance, if it has 100 files, and a new version has a change in only one of those files,
pnpm updatewill only add 1 new file to the store, instead of cloning the entire dependency just for the singular change. - All the files are saved in a single place on the disk. When packages are installed, their files are hard-linked from that single place, consuming no additional disk space. This allows you to share dependencies of the same version across projects.
As a result, you save a lot of space on your disk proportional to the number of projects and dependencies, and you have a lot faster installations!
Prerequisites
Getting Started
First, You can find the code for this repo here
Let’s init Our Monorepo.
$ pnpm initSetting up the Monorepo structure
The structure of a monorepo might vary depending on what you plan to use it for. In our scenario, we’ll create 2 folders:
- apps: contains our nuxt 3 applications
- packages”: contains our modules, components, plugins, etc...
So we need to create apps and packages folders within the root of the project.
Then we need to configure pnpnm to properly recognize the monorepo workspace. In order to do that, we must have a pnpm-workspace.yaml file in the root directory, defining our monorepo structure. So let’s create it.
# pnpm-workspace.yaml
packages:
  # all packages in sub dirs of packages/ and apps/
  - 'packages/**'
  - 'apps/**'
Next, we need to create a .npmrc file in the root folder and add:
# .npmrc
shamefully-hoist=true
I Have no Idea why but you can check this open issue in nuxt.
Finally, we need to create .gitignore file to ignore all node_modules folders from git.
# .gitignore
node_modules
Create Nuxt 3 applications
Now that we’ve init our workspace, we can start creating multiple nuxt 3 applications in the apps directory
/apps> $ pnpm dlx nuxi init website1
/apps> $ pnpm dlx nuxi init website2
Next, we need to install dependencies. In the root folder run:
$ pnpm iInside a pnpm Workspace, pnpm install installs all dependencies in all the projects. So this will install dependencies in our website1 and website2 applications.
Now We need to change the port & the name for both applications So we need to update package.json :
// package.json for website 1
{
  "private": true,
  "name": "website1",
  "scripts": {
    "build": "nuxt build",
    "dev": "nuxt dev --port=3010", // ⬅️ change port
    "generate": "nuxt generate",
    "preview": "nuxt preview",
    "postinstall": "nuxt prepare"
  },
  "devDependencies": {
    "nuxt": "3.0.0-rc.11"
  }
}
// package.json for website 2
{
"private": true,
"name": "website2",
"scripts": {
"build": "nuxt build",
"dev": "nuxt dev --port=3020", // ⬅️ change port
"generate": "nuxt generate",
"preview": "nuxt preview",
"postinstall": "nuxt prepare"
},
"devDependencies": {
"nuxt": "3.0.0-rc.11"
}
}Now, Our first website will run on port 3010 and the second website will run on port 3020.
The final step is to run our applications.
To run both of them we can type:
$ pnpm run -r dev-r refers to “recursively” so this runs the “dev” command from each package's "scripts" object. If a package doesn't have the command, it is skipped.
In our case, this will run both website1 and website2
Here’s the output:
# Terminal Output
Scope: 2 of 3 workspace projects
apps/website1 dev$ nuxt dev --port=3010
│ Nuxi 3.0.0-rc.11
│ Nuxt 3.0.0-rc.11 with Nitro 0.5.4
│   > Local:    http://localhost:3010/
│   > Network:  http://192.168.19.210:3010/
│ i Vite client warmed up in 1820ms
│ √ Nitro built in 1296 ms
└─ Running...
apps/website2 dev$ nuxt dev --port=3020
│ Nuxi 3.0.0-rc.11
│ Nuxt 3.0.0-rc.11 with Nitro 0.5.4
│   > Local:    http://localhost:3020/
│   > Network:  http://192.168.19.210:3020/
│ i Vite client warmed up in 2038ms
│ √ Nitro built in 1164 ms
└─ Running...
Congratulations! Now we’ve finished setting up our applications!
Next, let’s start building our packages!
Create Our First Package
The key to creating packages is to make use of Nuxt 3 Modules. Nuxt provides a zero-config experience with a preset of integrations and best practices to develop web applications. A powerful configuration and hooks system makes it possible to customize almost every aspect of the Nuxt framework and add endless possible integrations when it comes to customization.
Let’s go to the packages folder and create our first package. Give it whatever name you want. In my case, I’ll name it nuxt3-websites-package
/packages/nuxt3-websites-package> $ pnpm initCreate Nuxt 3 Module
First, we need to install @nuxt/kit to be able to define our nuxt Module
/packages/nuxt3-websites-package> $ pnpm i @nuxt/kitNext, create an index.ts file in the root of the package and make it an entry point in.
// packages/nuxt3-websites-package> package.json
{
  "name": "nuxt3-websites-package",
  "version": "1.0.0",
  "description": "",
  "main": "index.ts",
  "scripts": {
    "test": "echo \"Error: no test specified\" && exit 1"
  },
  "keywords": [],
  "author": "",
  "license": "ISC"
}
Now inside index.ts we need to setup our modules:
// packages/nuxt3-websites-package> index.ts
import { defineNuxtModule } from '@nuxt/kit';

export default defineNuxtModule({
    setup(_, nuxt) {
        // here we need to setup our components
    }
})
Now, let’s create our component.
Create Reusable Components
inside this package, we’ll create our Btn component
The best practice is to create the Btn inside the lib/components folder.
So the package structure will look like this:
|__lib
|_____components
|___________Btn.vue
|__index.ts
|__package.json
Inside Btn.vue, we’ll make a simple button:
/* Btn.vue */
<template>
    <button>
        <slot></slot>
    </button>
</template>

<style  scoped>
button {
    border: none;
    padding: 10px 20px;
    background: blue;
    color: white;
    border-radius: 5px;
    /* some other stuff */
}
</style>
Assign our component using Nuxt Module Hooks
Nuxt 3 provides a hook named: components:dirs which can we use to extend the components folder and assign a new folder.
The goal is to assign lib/components folder. Thus, this folder will be assigned to each nuxt application that installs this package.
You can read more about Nuxt hooks from Nuxt 3 docs.
Now let’s update index.ts and assign the components folder.
// packages/nuxt3-websites-package> index.ts
import { defineNuxtModule } from '@nuxt/kit'
import { join } from 'path'

export default defineNuxtModule({
  setup(_, nuxt) {
    nuxt.hook('components:dirs', dirs => {
      dirs.push({
        path: join(__dirname, 'lib/components'),
        prefix: 'nx3',
      })
    })
  },
})
Notice that we’ve added a prefix for all of our components, so our button will be named: nx3-btn
Finally, Let’s install this module in our applications using:
$ pnpm i nuxt3-websites-package --filter website1
$ pnpm i nuxt3-websites-package --filter website2
Then Register these modules in nuxt.config.ts
// nuxt.config.ts
export default defineNuxtConfig({
modules: ['nuxt3-websites-package']
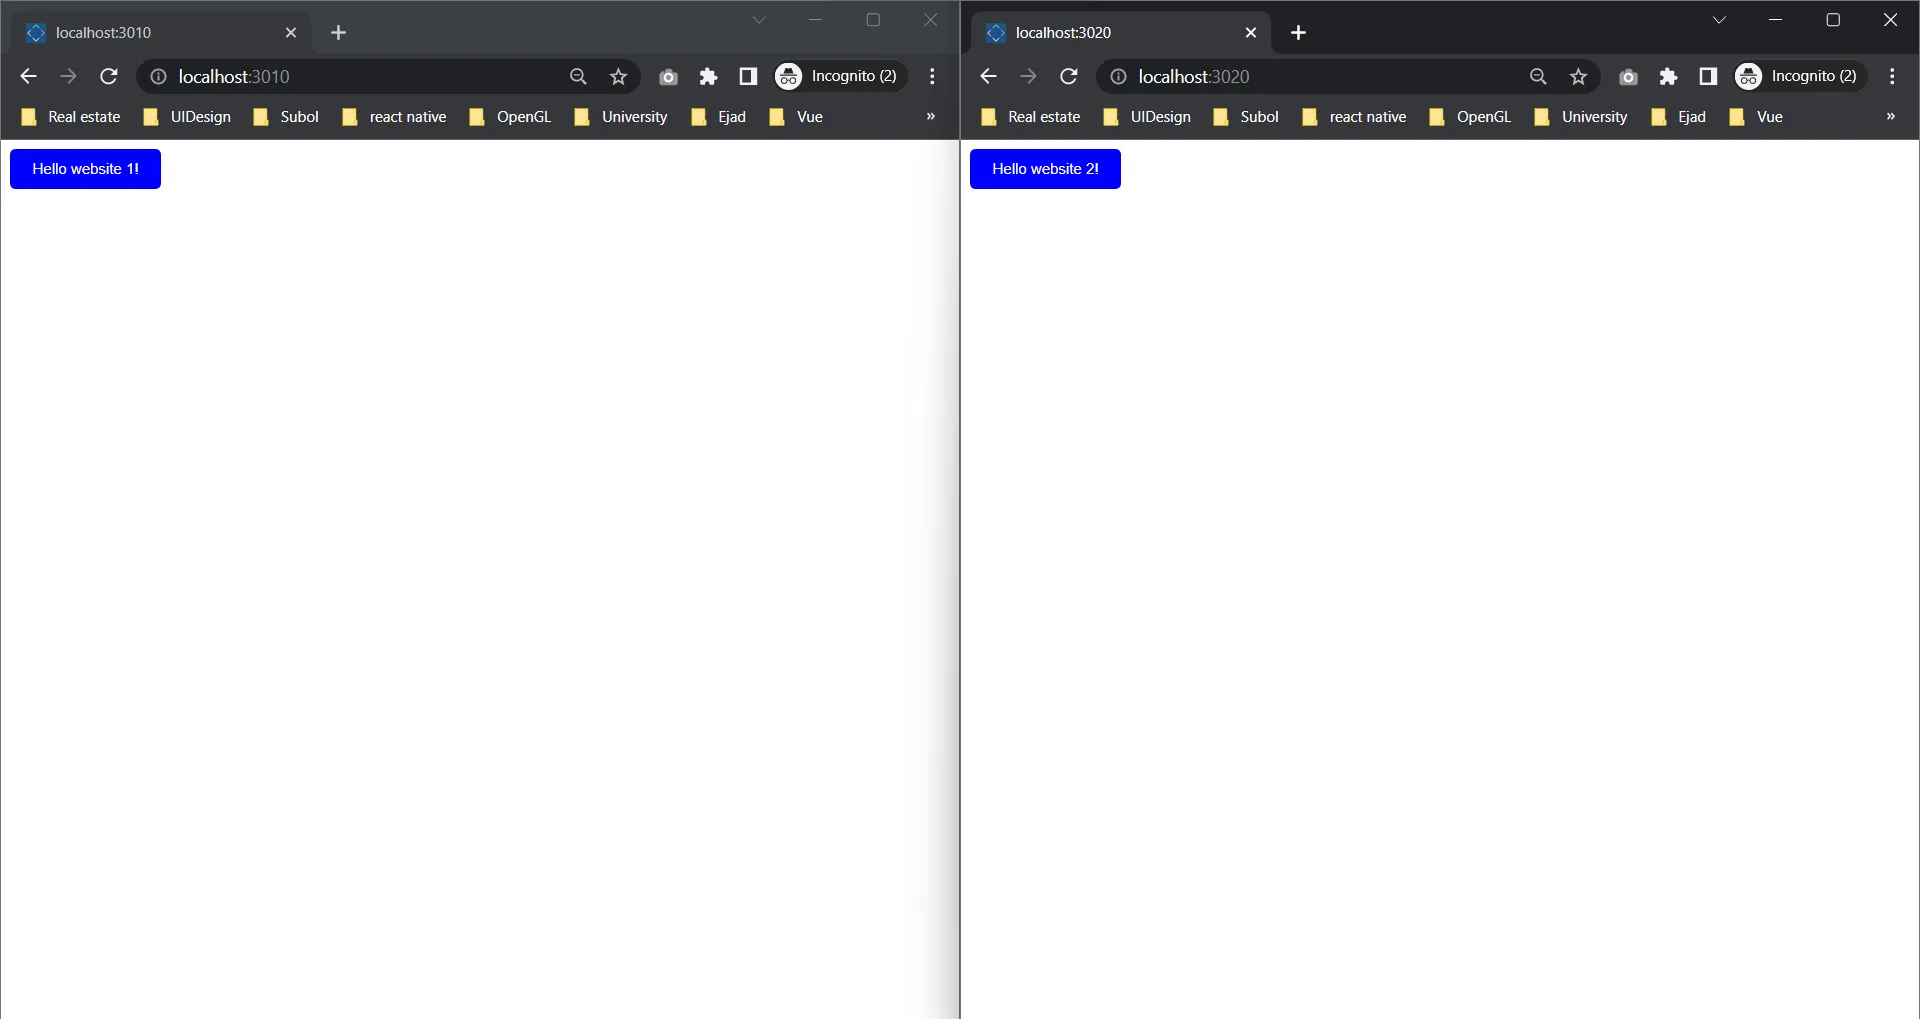
})Now we can use our nx3-btn in both applications. Let’s add it to App.vue on website1:
/* App.vue in website1 */
<template>
<div>
<nx3-btn> smile 1 </nx3-btn>
</div>
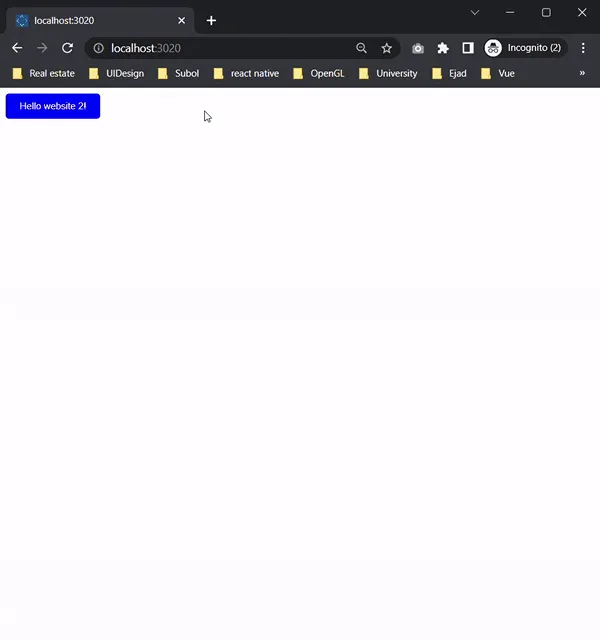
</template>and to App.vue on website 2:
/* App.vue in website2 */
<template>
  <div>
        <nx3-btn> smile 2 </nx3-btn>
  </div>
</template>
Result:

Voila!! we’ve created a package that contains reusable components!
What next? Let’s add a plugin for this package!
Create a Plugin and assign it to our module
Now let’s create a Nuxt 3 plugin, For example, we’ll create a plugin that provides a global helper function to generate a “hello” message!
First, we’ll create the plugin file: lib/plugins/helper.ts
// packages/nuxt3-websites-package/lib/plugins> index.ts
export default defineNuxtPlugin(() => {
    return {
        provide: {
            hello: (msg: string) => `Hello ${msg}!`
        }
    }
})
Now the package structure will look like this:
|__lib
|_____components
|___________Btn.vue
|_____plugins
|___________helper.ts
|__index.ts
|__package.json
Next, we need to register this plugin in our module using addPlugin function (which is provided from @nuxt/kit):
Updated index.ts:
// packages/nuxt3-websites-package> index.ts
import { addPlugin, defineNuxtModule, createResolver } from '@nuxt/kit'
import { join } from 'path'

export default defineNuxtModule({
  setup(_, nuxt) {
    nuxt.hook('components:dirs', dirs => {
      dirs.push({
        path: join(__dirname, 'lib/components'),
        prefix: 'nx3',
      })
    })

    const { resolve } = createResolver(import.meta.url)

    // add the helper plugin
    addPlugin(resolve('lib/plugins/helper.ts'))
  },
})
Finally, we can use the $hello helper function inside our button for example:
App.vue for the first website:
/* App.vue in website1 */
<template>
    <div>
        <nx3-btn> {{ $hello('website 1') }} </nx3-btn>
    </div>
</template>
App.vue for the second website:
/* App.vue in website2 */
<template>
    <div>
        <nx3-btn> {{ $hello('website 2') }} </nx3-btn>
    </div>
</template>
Result:
Finally, let’s add a CSS file to our Module!
Add CSS Library
In this example, I’m going to install the animate.css library in our package as a dependency and import its CSS file.
First, install animate.css
/packages/nuxt3-websites-package> $ pnpm i animate.css

# alternatively, you can run this command in root folder:
$ pnpm --filter nuxt3-websites-package  i animate.css
Then we need to register this file in our module, using nuxt.options.css.push in setup function.
Updated index.ts:
// packages/nuxt3-websites-package> index.ts
import { addPlugin, defineNuxtModule, createResolver } from '@nuxt/kit'
import { join } from 'path'

export default defineNuxtModule({
  setup(_, nuxt) {
    nuxt.hook('components:dirs', dirs => {
      dirs.push({
        path: join(__dirname, 'lib/components'),
        prefix: 'nx3',
      })
    })

    const { resolve } = createResolver(import.meta.url)

    // add the helper plugin
    addPlugin(resolve('lib/plugins/helper.ts'))

    // add animate.css file from animate.css library
    nuxt.options.css.push('animate.css')
  },
})
Now we can use animate.css classes in our applications!
For example, we can add a bounce effect.
/* App.vue in website1 */
<template>
    <div>
        <nx3-btn class="animate__animated animate__bounce">
            {{ $hello('website 1') }}
        </nx3-btn>
    </div>
</template>
/* App.vue in website1 */
<template>
<div>
<nx3-btn class="animate__animated animate__bounce">
{{ $hello('website 2') }}
</nx3-btn>
</div>
</template>Result:
Conclusion
YES!! We did it! Here are some of the things we covered:
- What is monorepo. and what is pnpm
- setup a pnpm based monorepo workspace with multiple nuxt 3 applications
- build and run these applications
- Create a third-party package to share components between the apps
- Create a nuxt module
- Add a plugin to our nuxt module
- add CSS library to our nuxt module
Checkout the final project on GitHub: pnpm monorepo with nuxt 3. While you’re at it, if you’d like to learn more about Nuxt 3 then checkout the upcoming Mastering Nuxt 3 course
Start learning Vue.js for free

Comments
Latest Vue School Articles

5 Component Design Patterns to Boost Your Vue.js Applications


Vibe Coding a Collaborative Editor with Comment Support with Nuxt UI and Jazz
Our goal is to be the number one source of Vue.js knowledge for all skill levels. We offer the knowledge of our industry leaders through awesome video courses for a ridiculously low price.
More than 200.000 users have already joined us. You are welcome too!
© All rights reserved. Made with ❤️ by BitterBrains, Inc.